Splish Splash
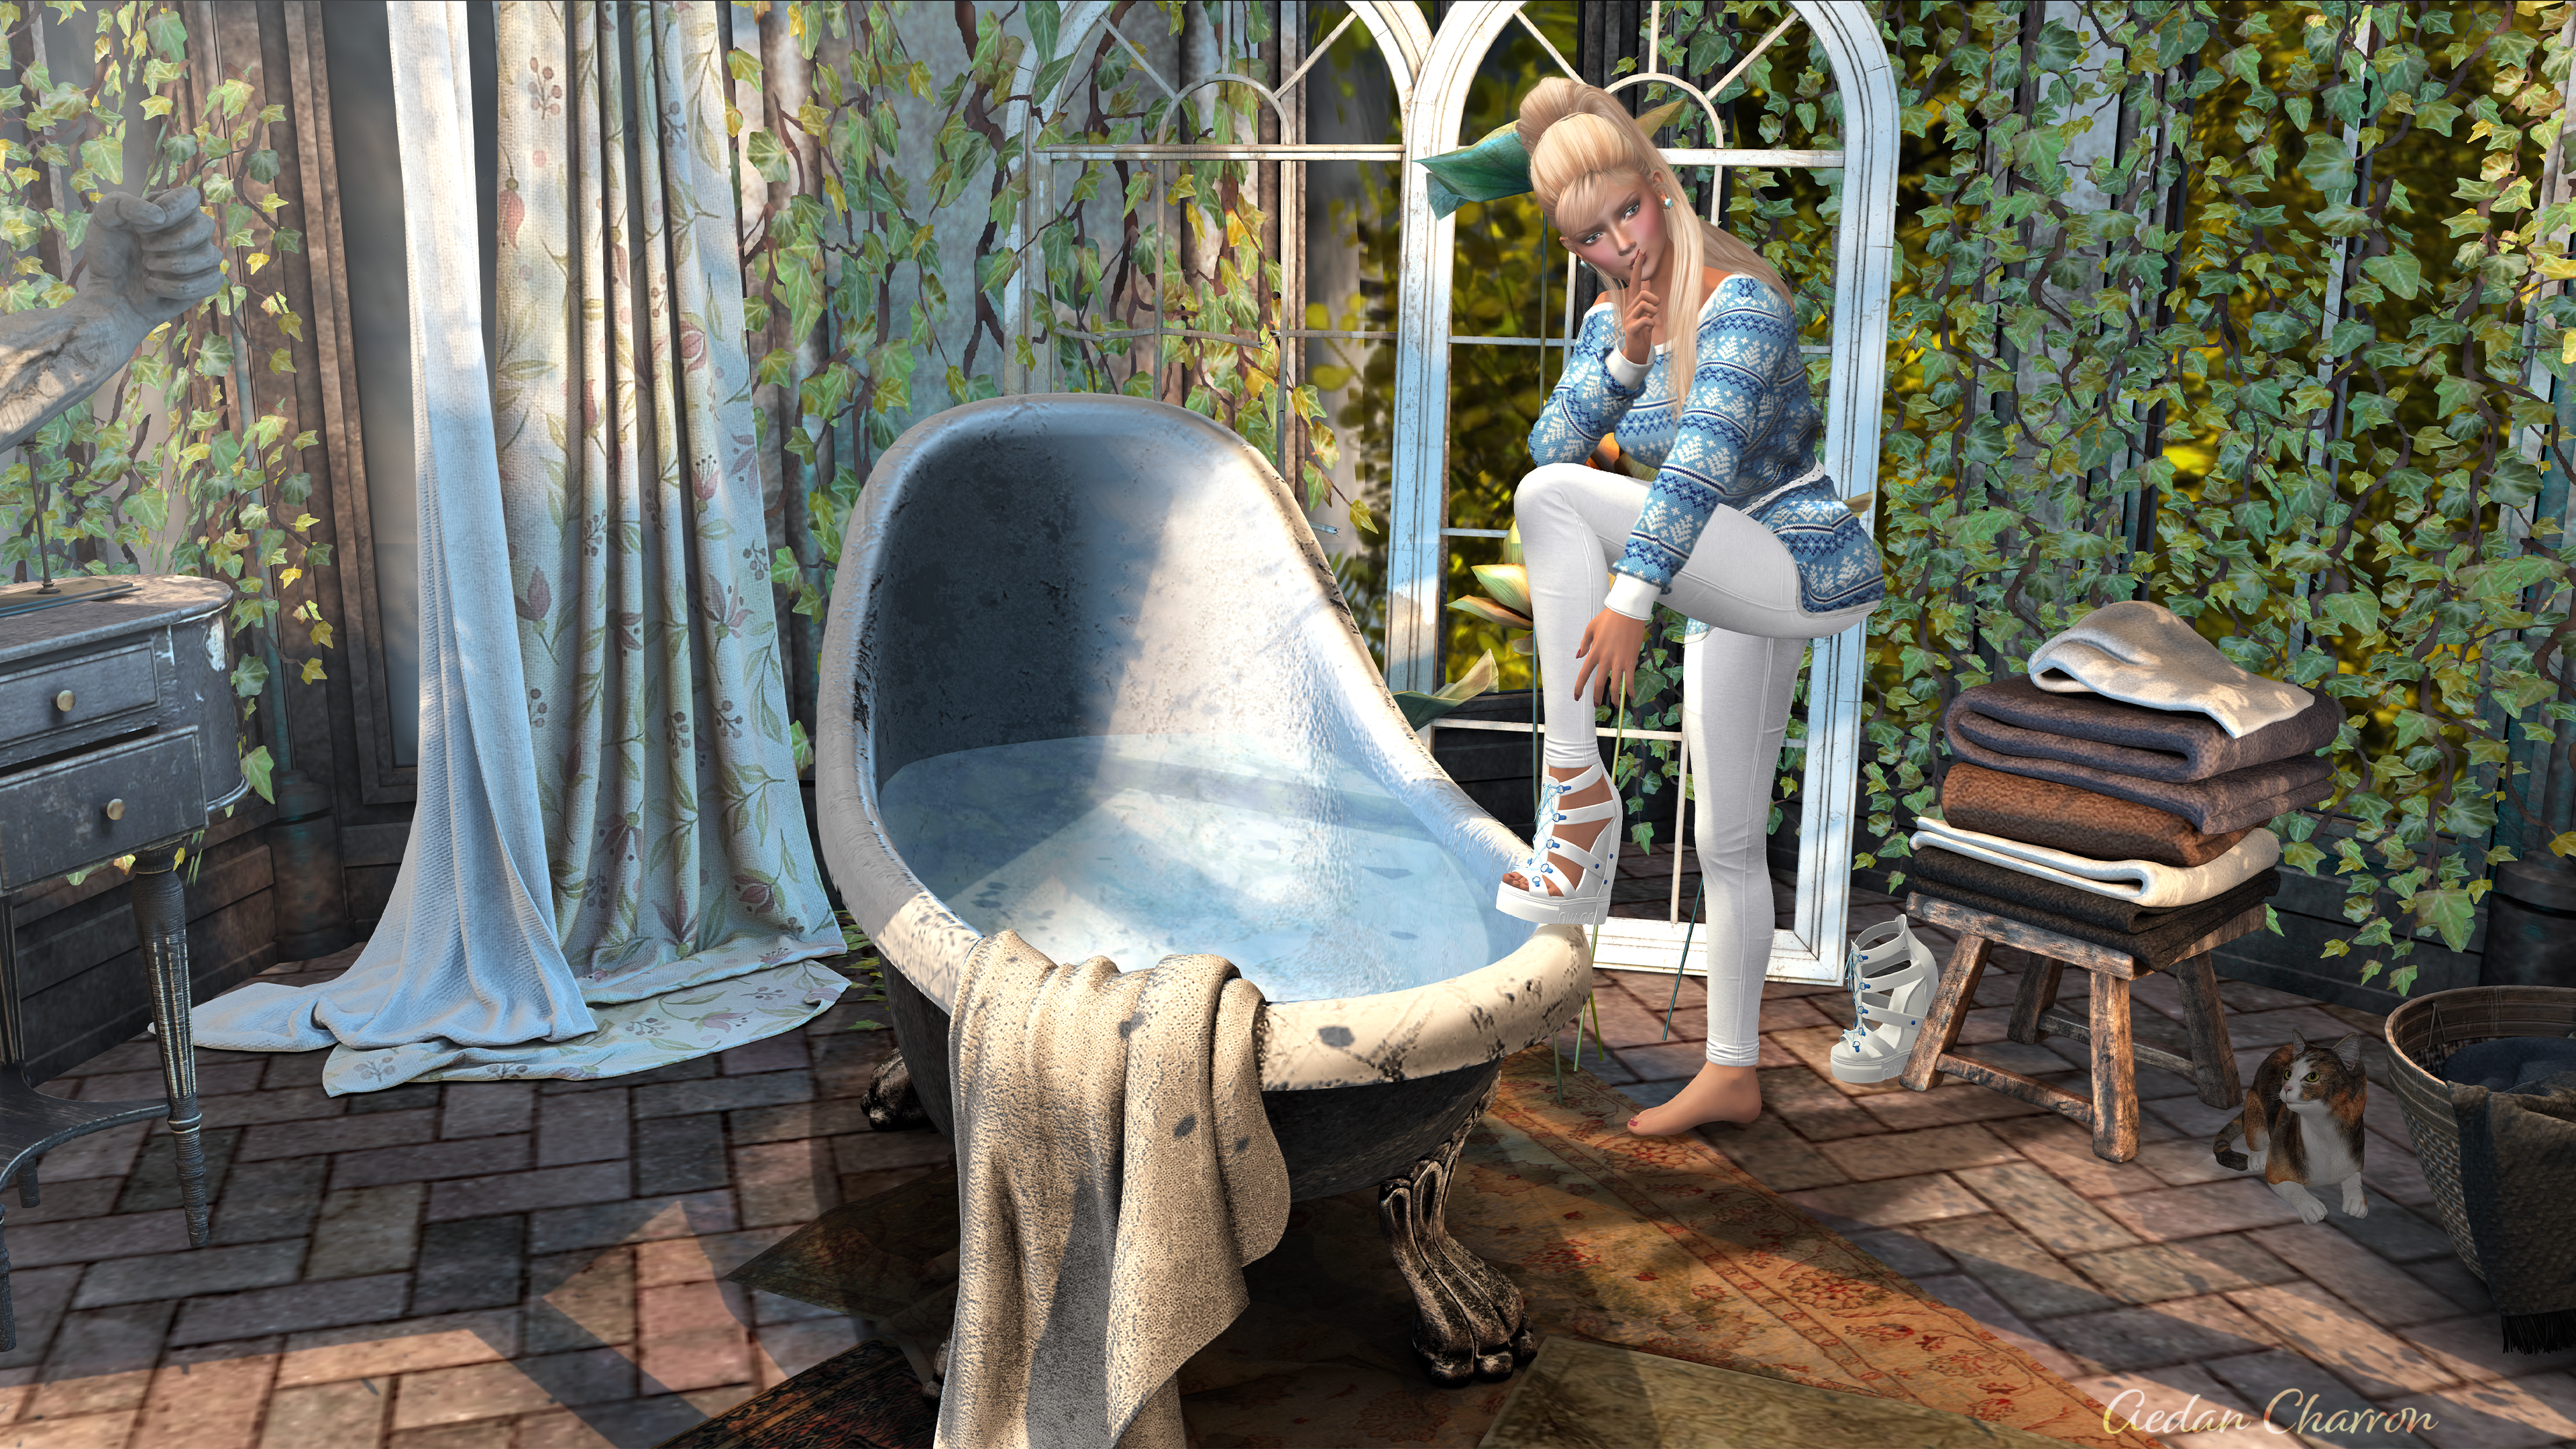
The Kindred Spirits sim has so many opportunities for photographs that Noel soon found herself unable to resist the temptation to enjoy the bath she stumbled across.
OK…so she did resist. Rather than jump into the bath right there, this image is a composite of the bath, Noel (several of her with and without shoes) and the cat whom I will affectionately call Calypso after a recent cat now passed in my RL. At some point, this cat will be updated to more closely resemble the real Calypso but that’s another story…another image.
I’ve seen many beautiful images created at the Kindred Spirits sim recently so, having a day off, I decided to send Noel to investigate. She came back with many images and I expect several will be making appearances in the coming week or so but this was the one that captivated her the most.
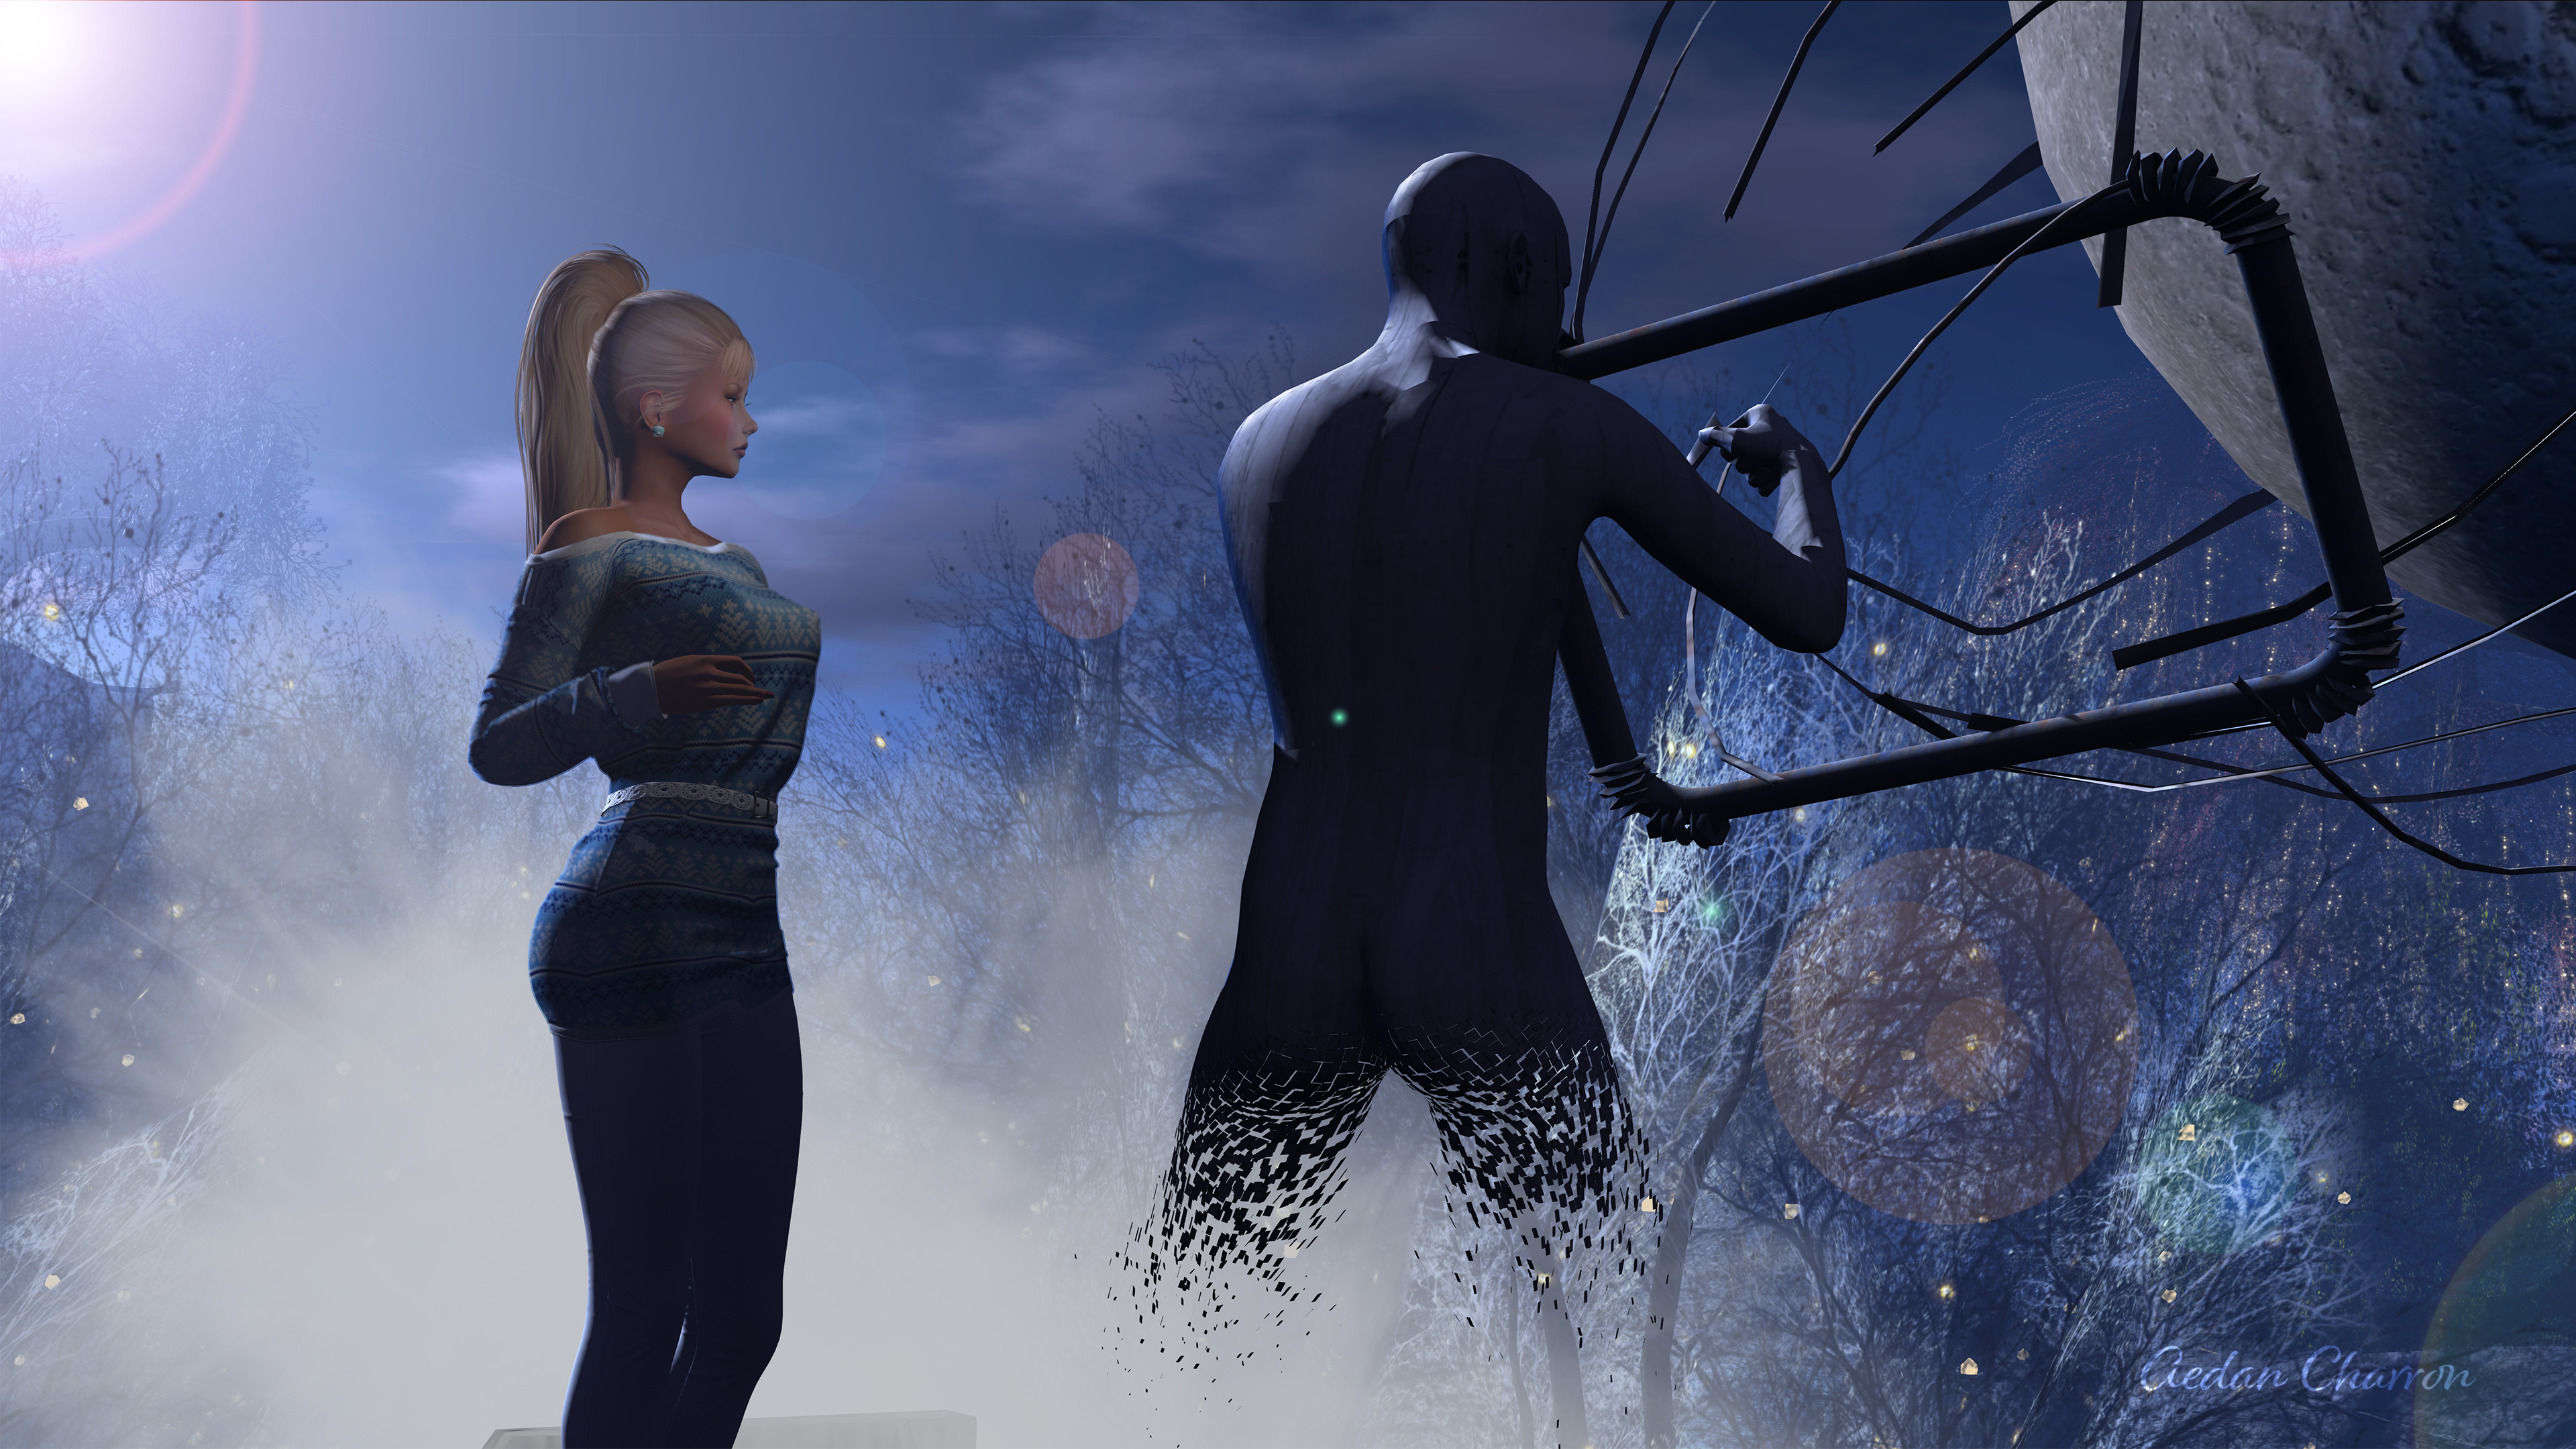
Very little post processing was done at all. In fact, what little I did isn’t even visible other than the lens flare (some highlights) so they’re not even worth pointing out. This image is primarily a creation of the person that created the vanishing man, the sim owner and the coders that enabled Windlight.
I’ve even struggled to name this one or choose a soundtrack to go with it but the day is slipping away so I’m sharing this now with the reservation that I may make some changes if something comes to mind.
Currently, I offer two selections to listen to…
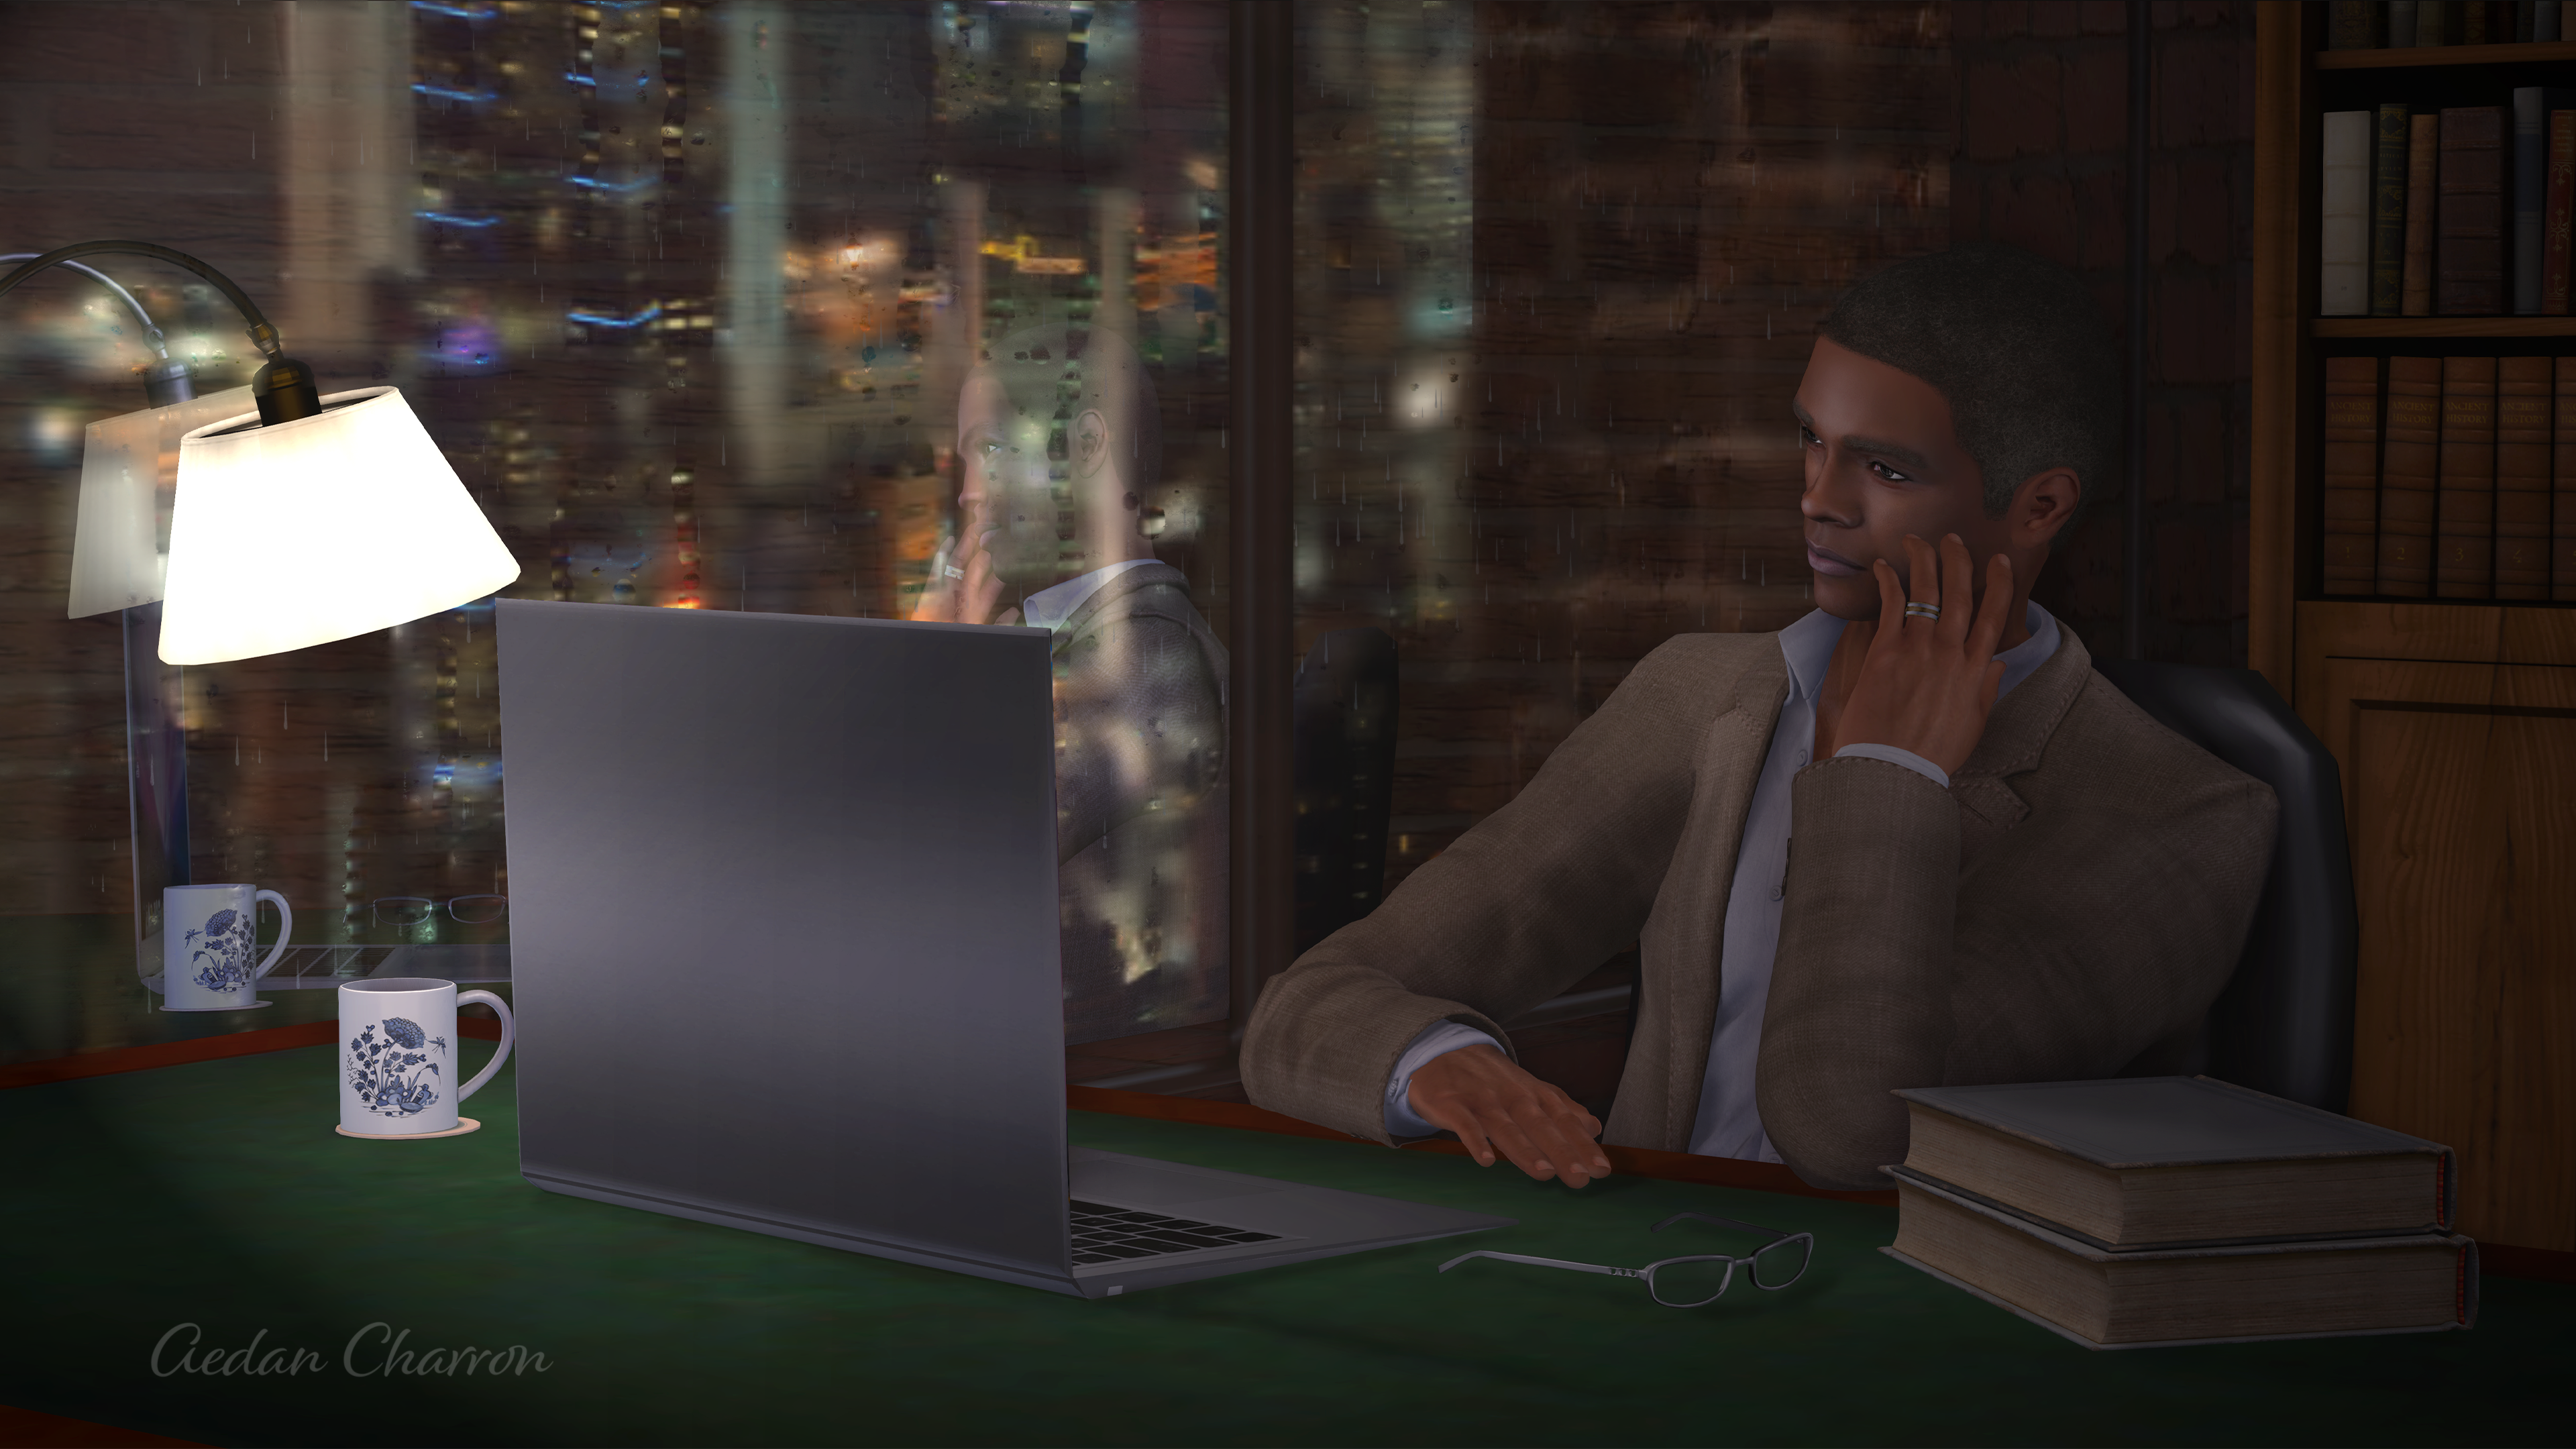
The ‘official’ introduction of Robert along with a tune to fit his character….in part.
This ended up being a fun image. As mentioned in an earlier post about Robert’s skin, I had to fix the embedded highlights first. It was initially a challenge until I figured out that both layers generated using frequency separation had to be cleaned up. It wasn’t simply a matter of fixing the color on the low freq layer but there was also texture in the high frequency layer that was affecting the visible color in it’s own way.
Additionally, I hadn’t noticed when the shot was taken that the recent SL phenomena of a very visible horizontal line crossed his face with everything below his upper lip being many shades darker. This two demanded cleanup on both layers.
The glass was the ‘new’ lesson for this image. I have done reflections prior to this (El Sombrero) but this time I wanted realistic rain outside. In addition to painting in rain, I duplicated the method used in the following video – including the wet glass texture.
I played with several techniques trying to get the light and shadow I wanted but finally settled on using the lighting effects filter to place a spotlight on the lamp and then adjust the spotlight size, shape and color along tweaking the ambient light a bit. In the end it is very close to what I had done with duplicating and multiplying the final layer and then shaping the light with a mask. The spotlight looked much more natural to me so why reinvent light?
Finally, to summarize the feeling that the act of creating Robert’s character for the story I’m writing and what I saw in the final image, I listened to many pieces trying to find one that suited. I settled on Overkill by Colin Hay (Men at Work)
I can’t get to sleep
I think about the implications
Of diving in too deep
And possibly the complications
Especially at night
I worry over situations
I know we’ll be alright
Perhaps it’s just imagination
Day after day it reappears
Night after night my heartbeat shows the fear
Ghosts appear and fade away
Alone between the sheets
Only brings exasperation
It’s time to walk the streets
Smell the desperation
At least there’s pretty lights
And though there’s little variation
It nullifies the night from overkill
Day after day it reappears
Night after night my heartbeat shows the fear
Ghosts appear and fade away
Come back another day
I can’t get to sleep
I think about the implications
Of diving in too deep
And possibly the complications
I worry over situations that
I know will be alright
It’s just overkill
Day after day it reappears
Night after night my heartbeat shows the fear
Ghosts appear and fade away
Ghosts appear and fade away
Ghosts appear and fade away
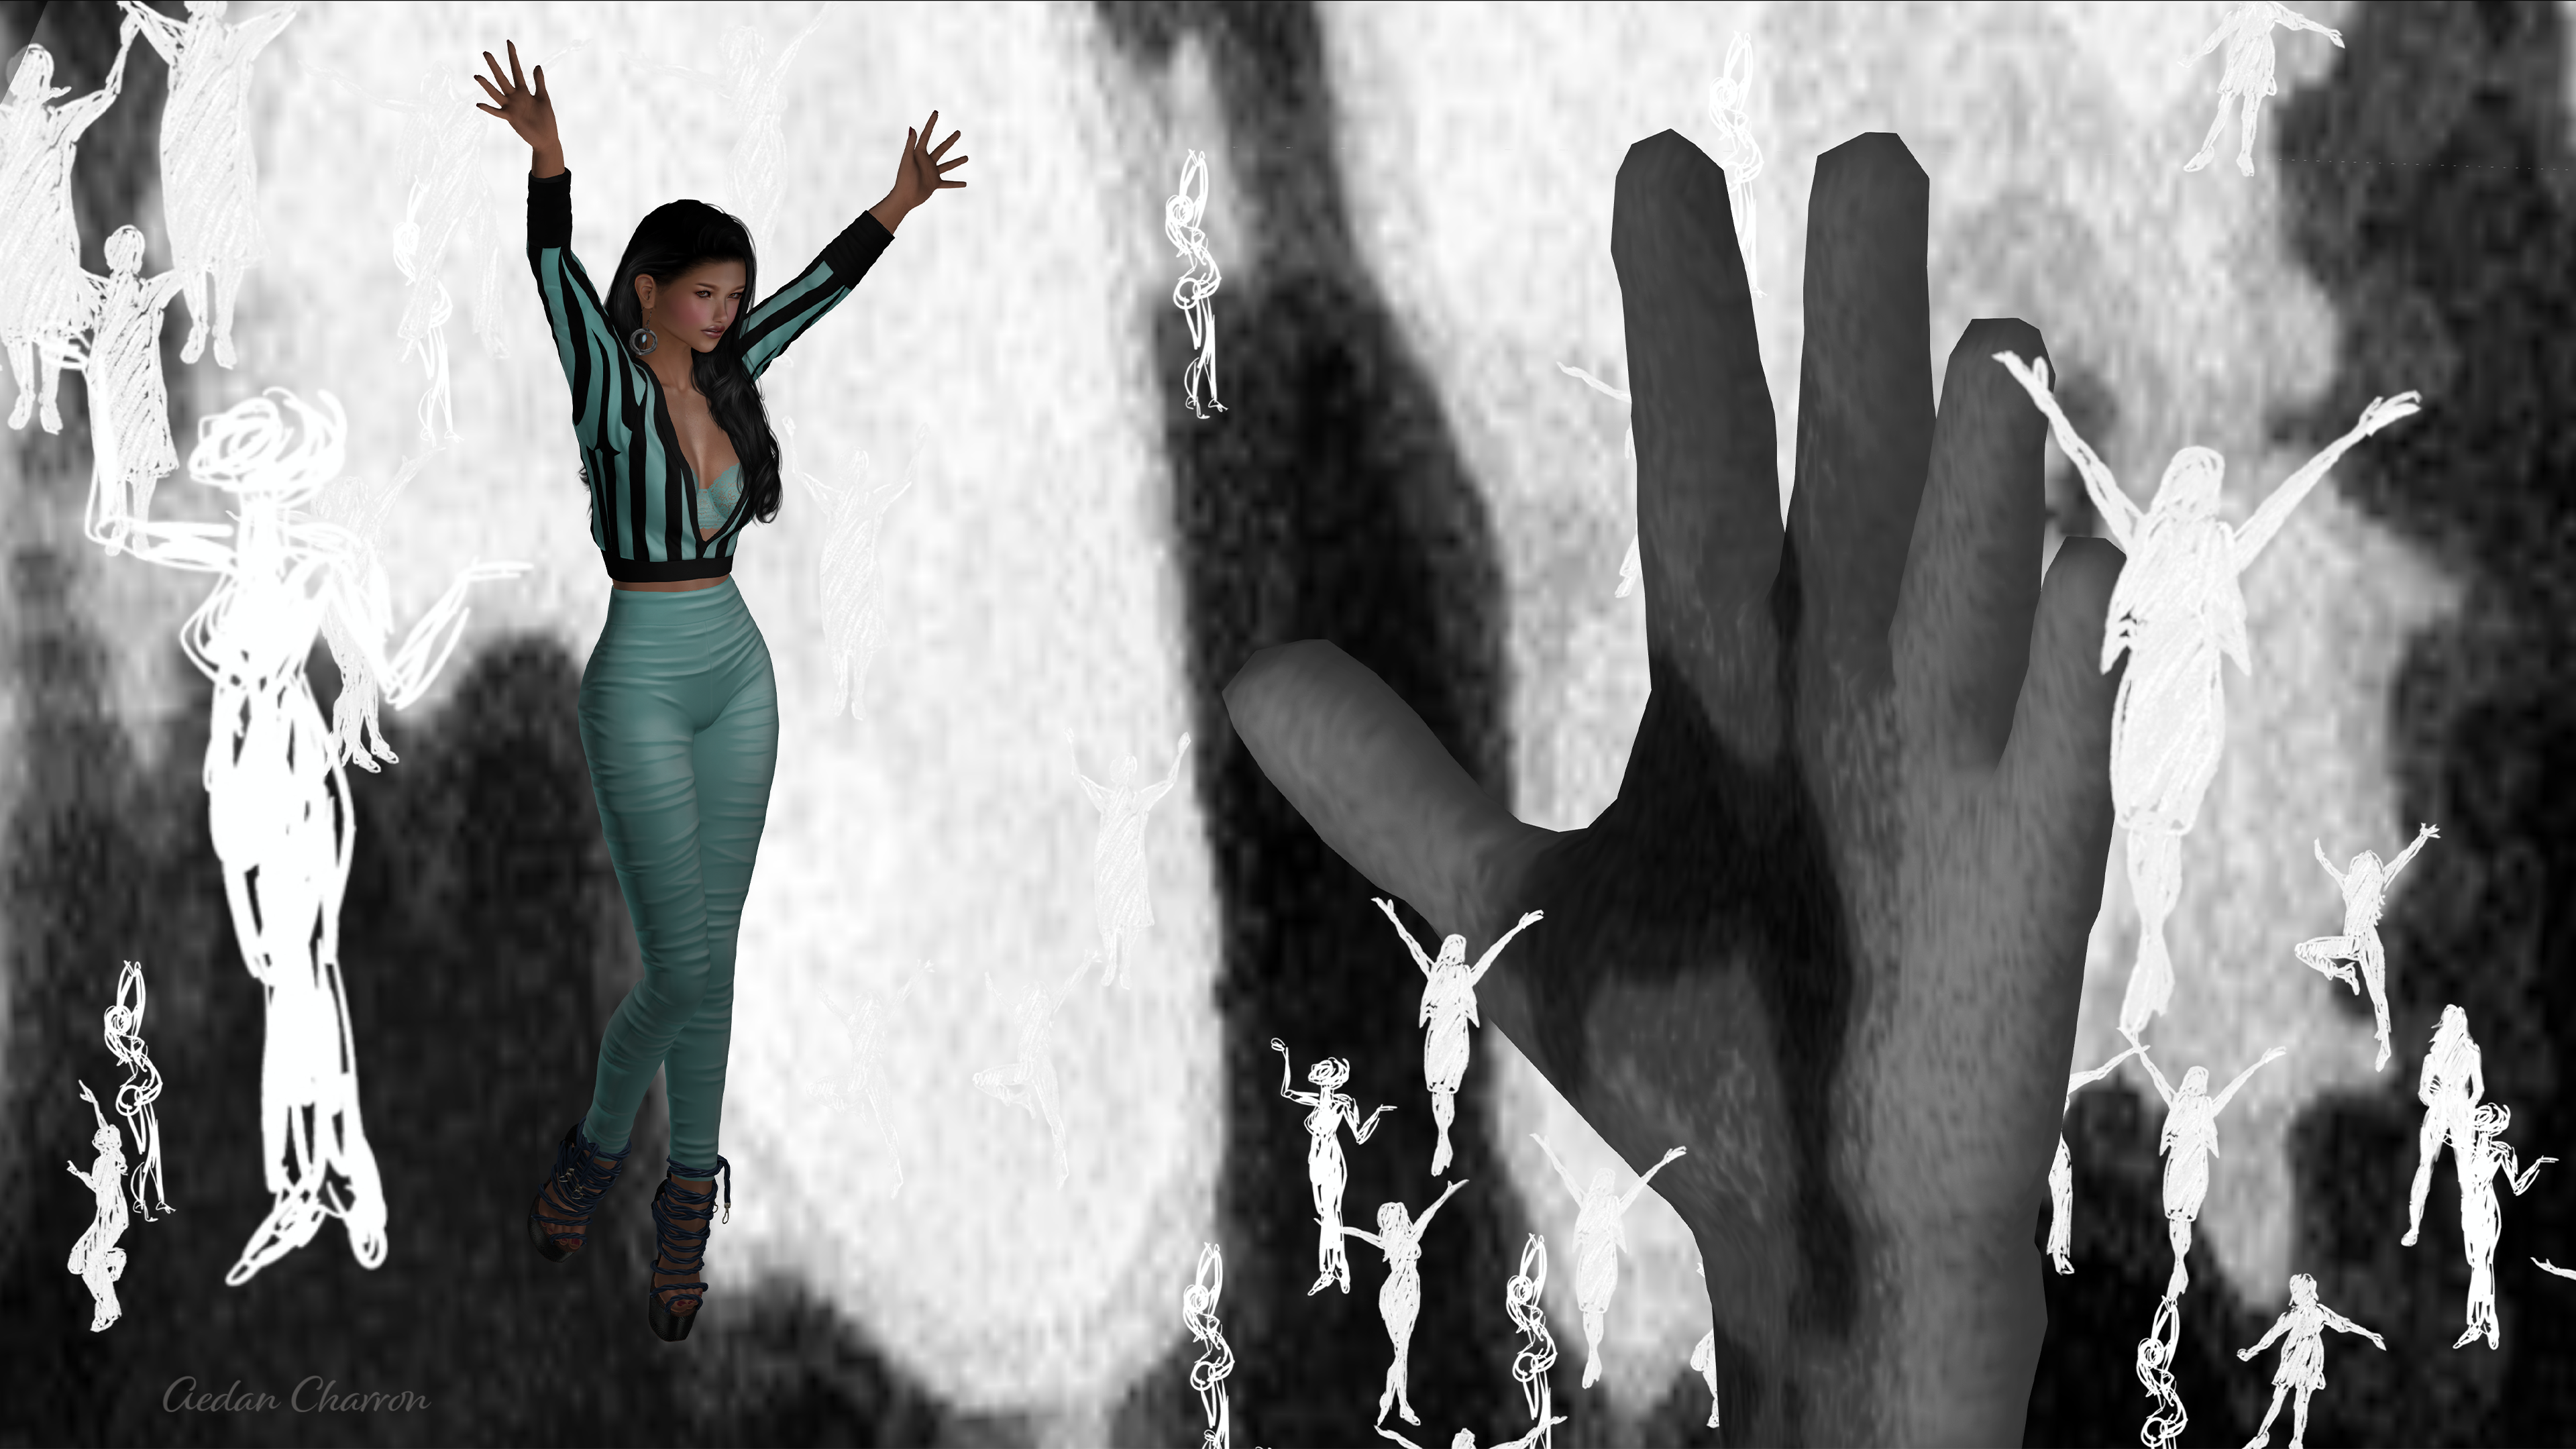
Being a fan of so many things Eastern for the last several years a post on the Secondlife Blog about a display taking Chinese Ink Drawings to the virtual world immediately caught my eye. It seemed like a perfect place for Kyashi to visit so I sent her on her way with no time to change her clothes.
What she saw was truly beautiful and she brought back several images of which I’m certain one or two will be used as a background in the future. We tried to find a place to get a photo of her in the man room but the alpha transparencies of her hair made that difficult. I wasn’t looking for a weekend project but something easy yet memorable. When she stepped into the room housing the One in a Billion display and couldn’t resist flying with the those already there, I noticed that the transparency didn’t show up when she was against a white background. We had a picture.
Probably the most difficult part of this image was finding a pleasing composition. Everything was moving except the giant hand. Putting that hand at the two third’s line in the image was easy. Putting Kyashi at the 1/3 line was not.
The problem was that the hand is REALLY big. Looking at the white figure just below the thumb might give an idea of the size. Those ‘souls’ are very close to human (virtual human, that is) size. Getting Kyashi to be in the right place AND fill the frame was the challenge. After some time, we finally found the sweet spot, way, way in front of the hand.
This was a straight shot. No composites – only several layers to enhance the highlights and shadows using the technique I had only learned the day before from this video.
This project was quite simple but reinforced what I had learned here. I’ve since learned another way to do highlights and shadows by duplicating the image twice then setting one to multiply to burn, using a layer mask and one to screen to lighten similarly. There are benefits and drawbacks from each method though I feel this one gives more control if you’re careful to not over do it.
I used this method to add highlights and shadow to her face and clothes in addition to bringing out some detail (highlights) in her hair.
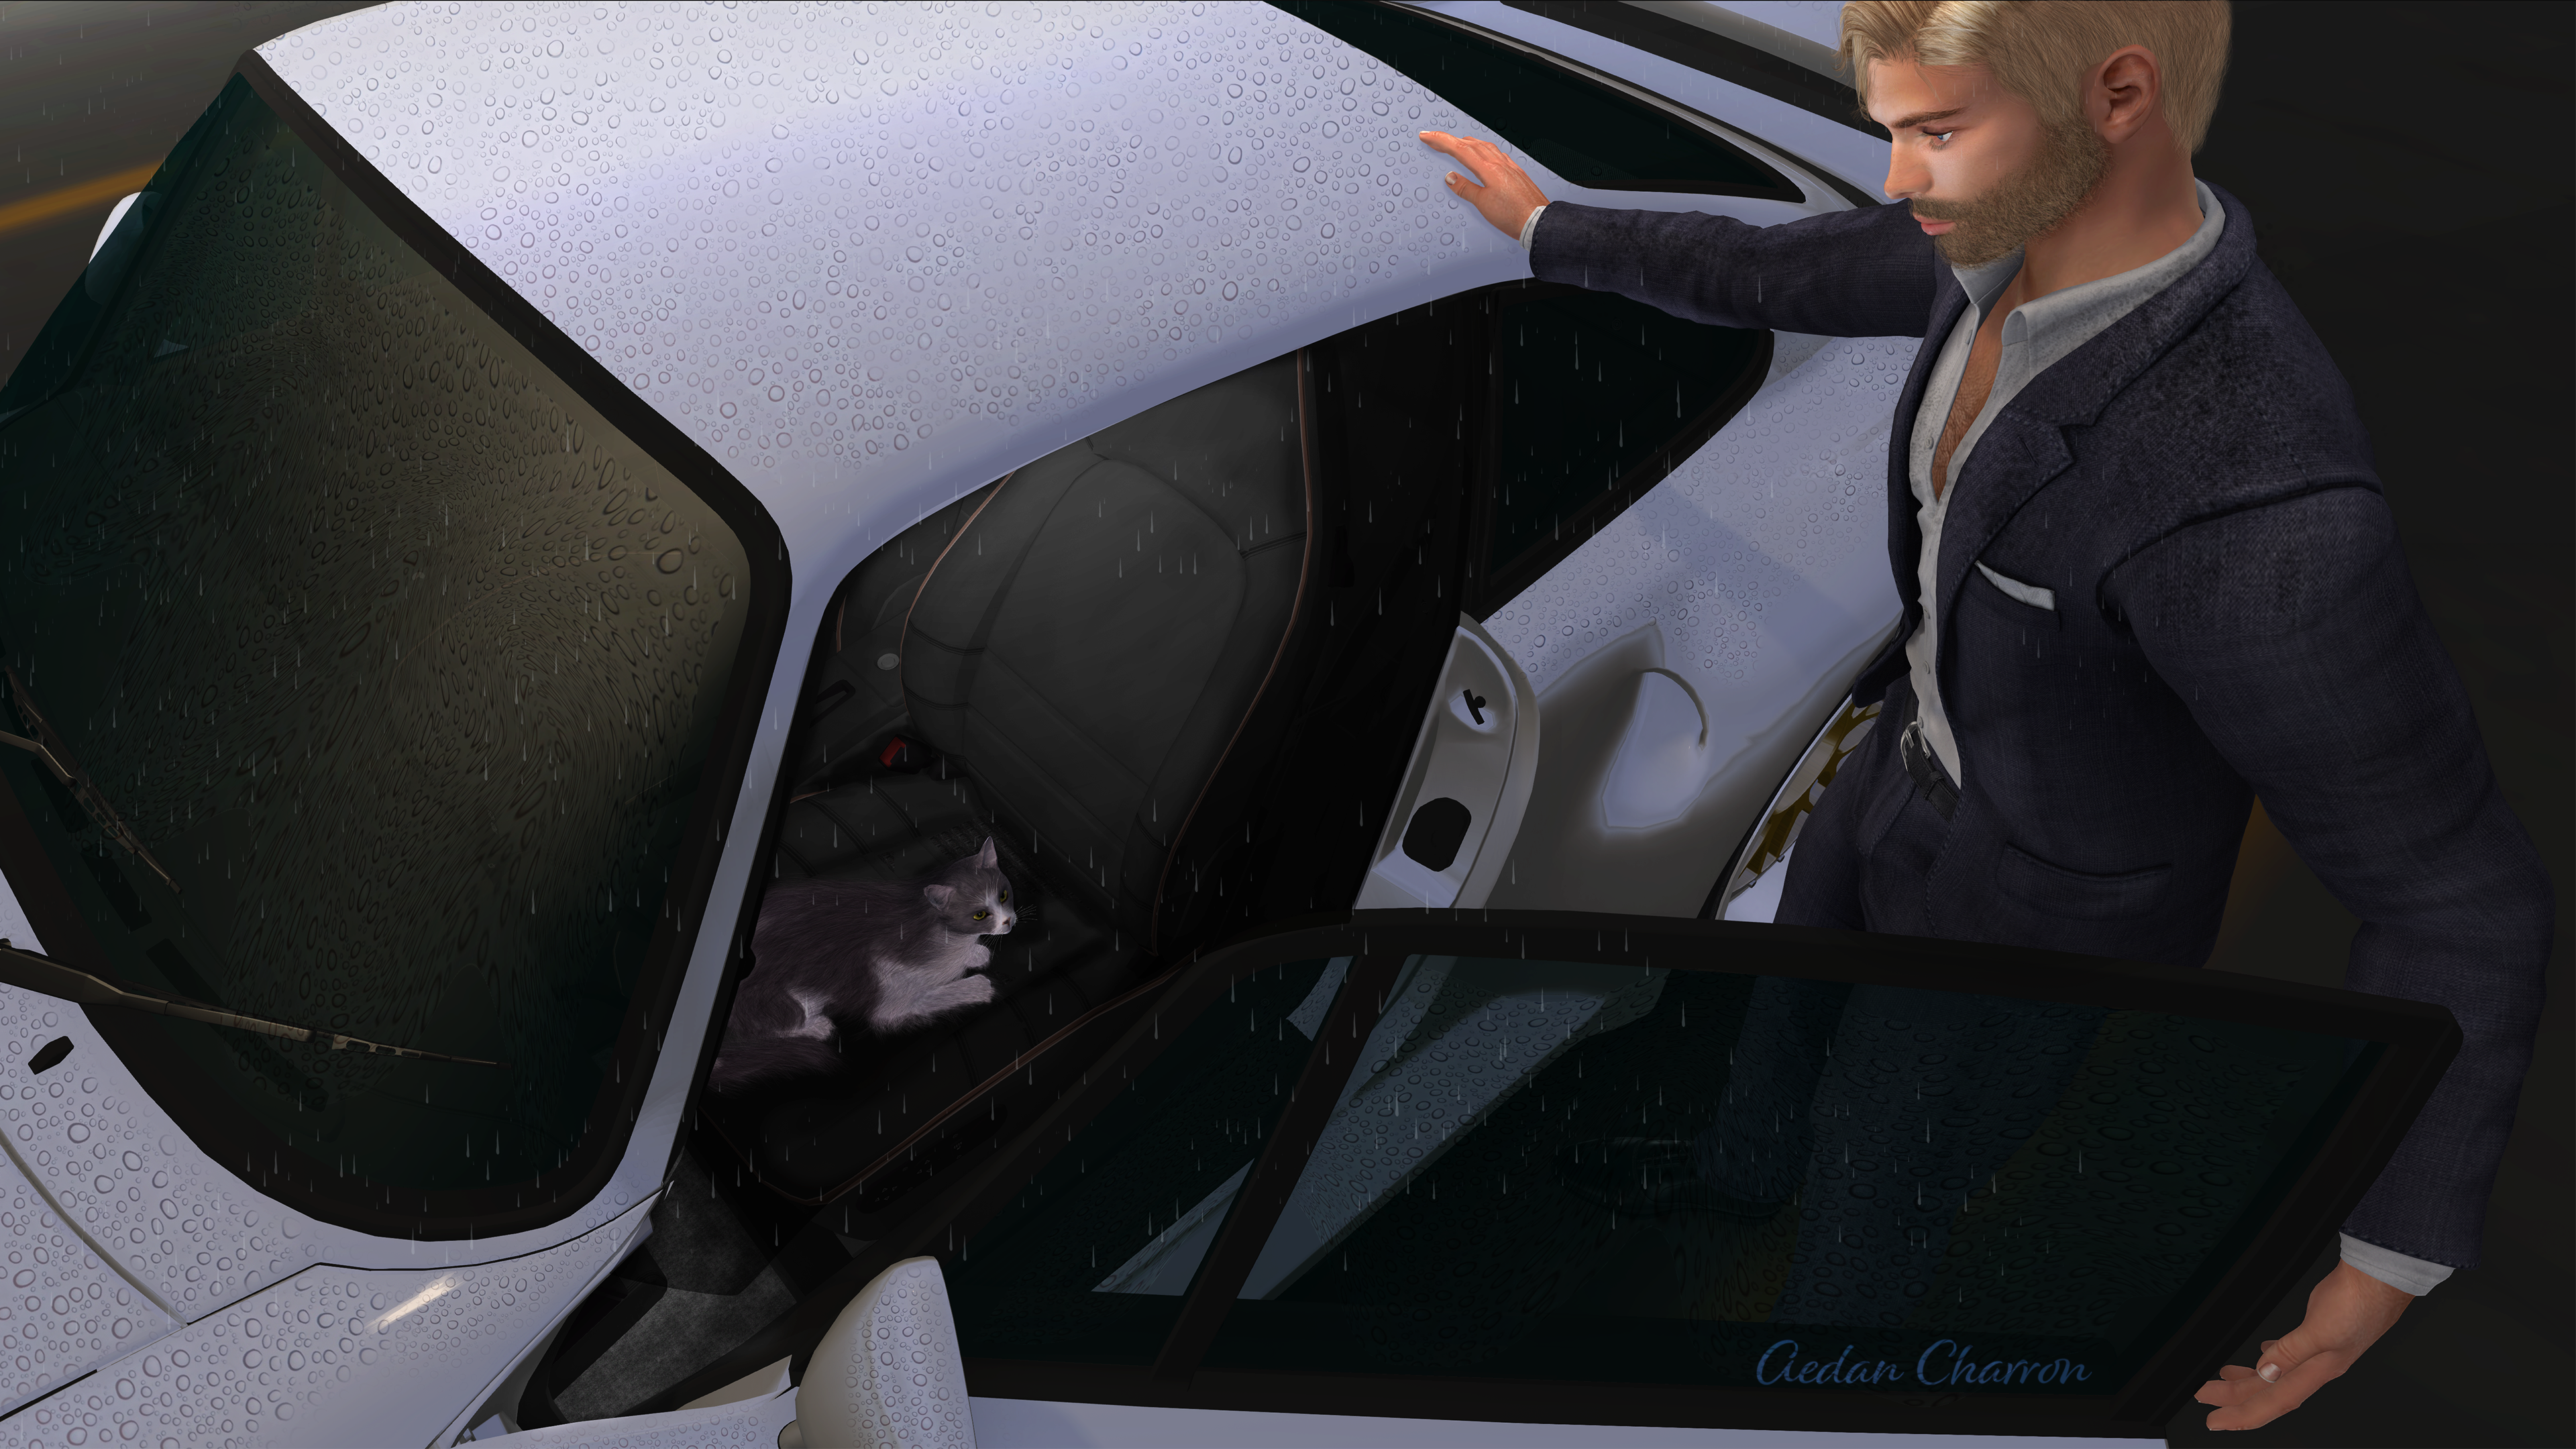
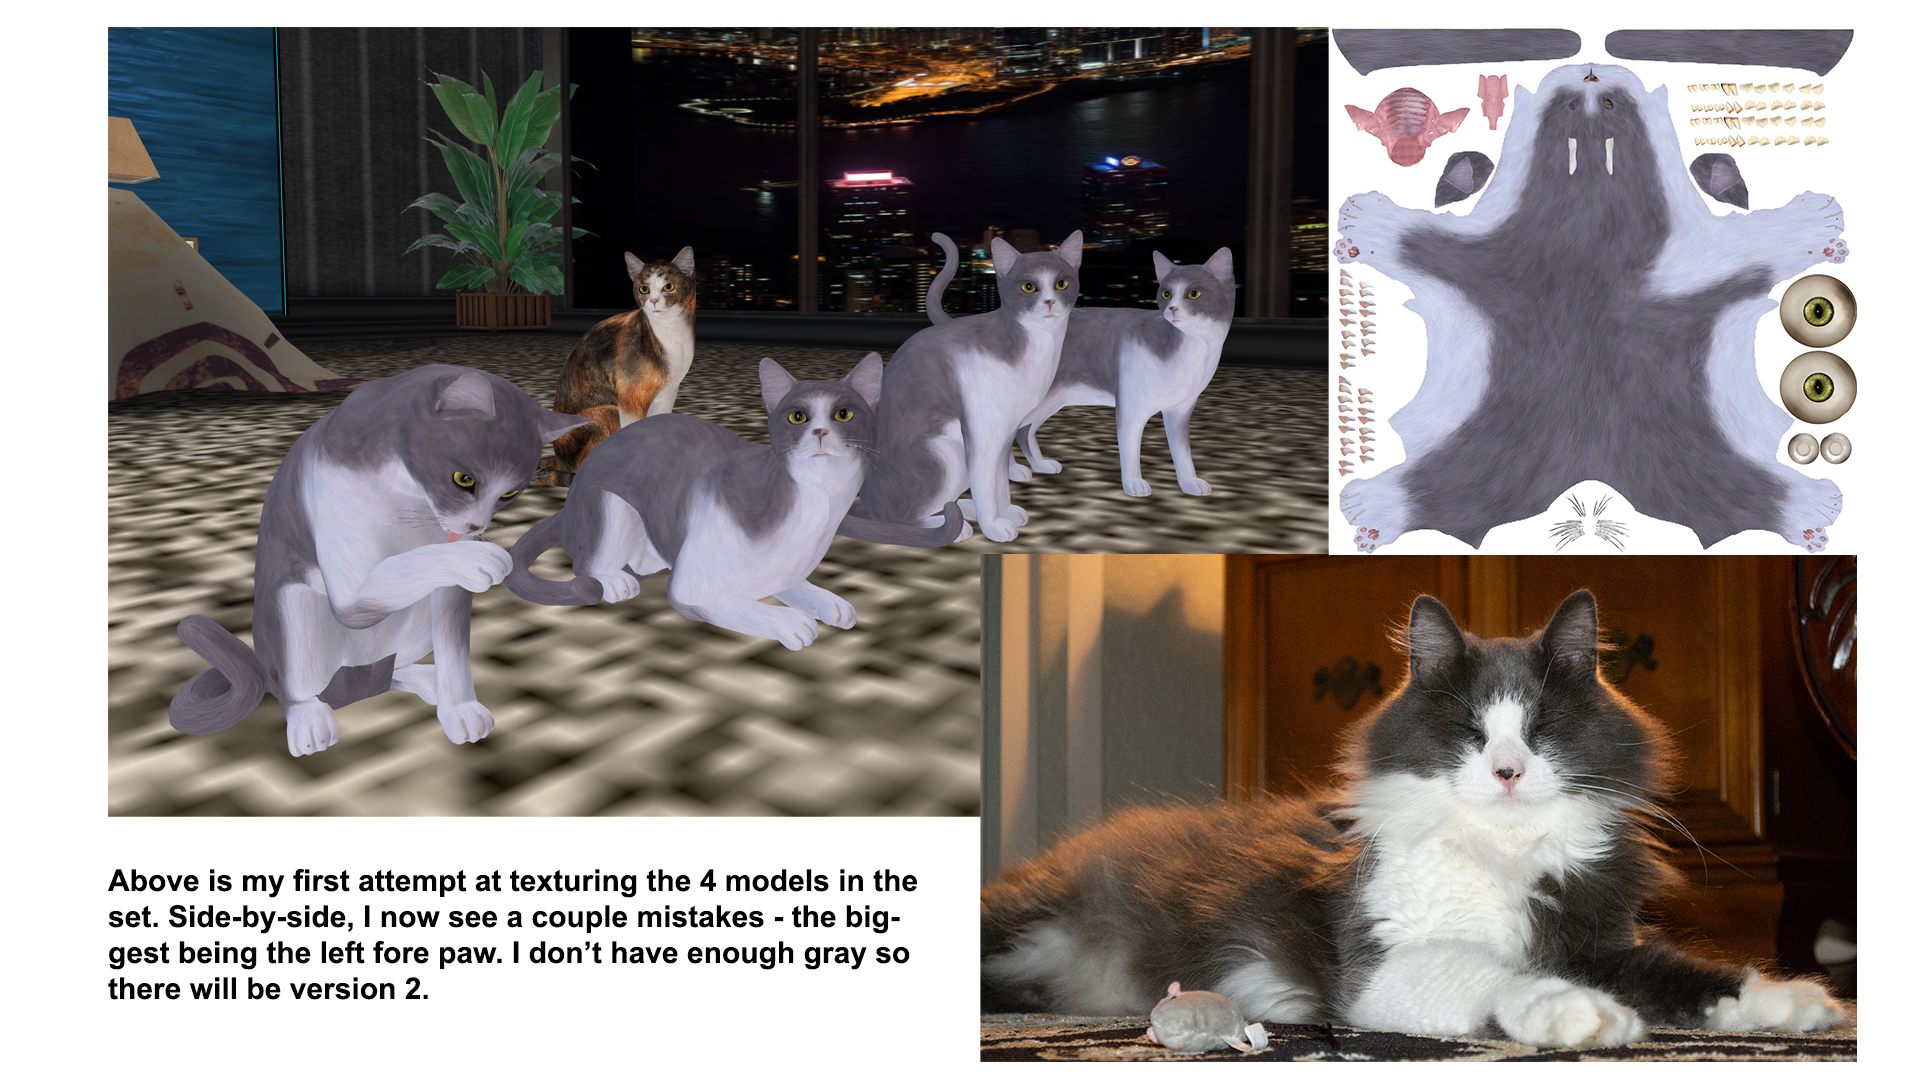
Meet Max. Max is my first attempt to grant my RL Maine Coon a tenth life, be it in SecondLife. This image was actually the logical conclusion to several areas of Photoshop that I’ve been concentrating on lately: hair and skin. You might ask “skin?” and no, it’s not obvious. In addition to that was the feeling that I needed to create something that I could also post to flickr since it’s been a few weeks.
The obvious first. Max is a hairball. Truly he is though the light in this picture doesn’t illustrate that well. I blame that on the weather but there will be more of him in the future. I’ll also be recreating the other two cats that I share a house with though neither of them has as much hair.
On the SL marketplace I located a full perms mesh cat. It came with the texture template so this was an immediate challenge that displaced everything else I was working on. Even as I examined max closely to map all of his markings for creating the new texture, I knew I would have to add more hair once that was uploaded and applied. In the end, the time I spent on the texture was complete overkill because none of it is visible, other than the ‘hairless’ image below. It does however, serve as a guide when painting on the additional hair after downloading the photo from SL.
On the subject of hair, Aedan received additional hair in PS, also.
How did skin play into this you might ask? It did because I was needing a break from skin after exploring how I would fix Robert’s skin problems. Oh! and because I wanted rain puddles on the car but failed to find an easy way to easily add hundreds or thousands of realistic looking puddles. I found lots of tutorials describing basically two ways of creating puddles but none addressed how tedious that would be to cover the top of a car just as rain started to fall.
Giving up on that, I went down a different path. After spending at least an hour googling to find a decent image of puddles that I could use but finding only varying colors that I couldn’t get to work, it dawned on me that my recent introduction to frequency separation, which is how I ultimately addressed Rober’s skin, might be the answer.
My search began again but this time looking at only puddles and ignoring the color. In the end, the one I settled on was actually close enough to use without separation. Setting the layer blend mode to softlight was sufficient. Still, I might be pounding my head on the desk if I had no hope that frequency separation would work.
In hind sight, I always see something that I wish I had spent more time on but I’ve come to the conclusion that it’s sometimes best to say ‘good enough’ and move on. There will be another opportunity in the future.
Finally, as I mentioned in the original Flickr post, there are lots of cats, dogs, animals of all kinds that are abandoned for various reasons. If you want the companionship of another, non-human being, please save one from a shelter or rescue. Don’t contribute to the massive problem of unwanted pets by purchasing from a store or breeder.

I am moving forward, if slowly, with continuing Aedan’s saga after his “spring break”. With a basic outline of how the story will go, I have been working on the character backgrounds to ensure all of the central characters are deep and don’t go off doing things willy-nilly.
I introduced Kyashi in the last post. This one is about Robert, or as most take the liberty to call him, Bob. After writing the character description, I know Bob very well. It should be no surprise that I spent a lot of time searching for a skin to fit the character in my mind and came up empty. In the end, I settled on “Orion” from Birth Skins.
The photo looks great. The skin is younger than I had hoped but most of my characters are not in their 20s so I knew finding skins in SL wouldn’t be easy. Unfortunately, part of what makes the Orion skin look so great in the ad are actually highlights painted onto the skin. I didn’t realize this before making the purchase. Without going on about how much time I spent trying to get around this and the frustration it brought, I’ll try to keep this short and simply show you what I ran into and how I’ll try to deal with it in upcoming photos.
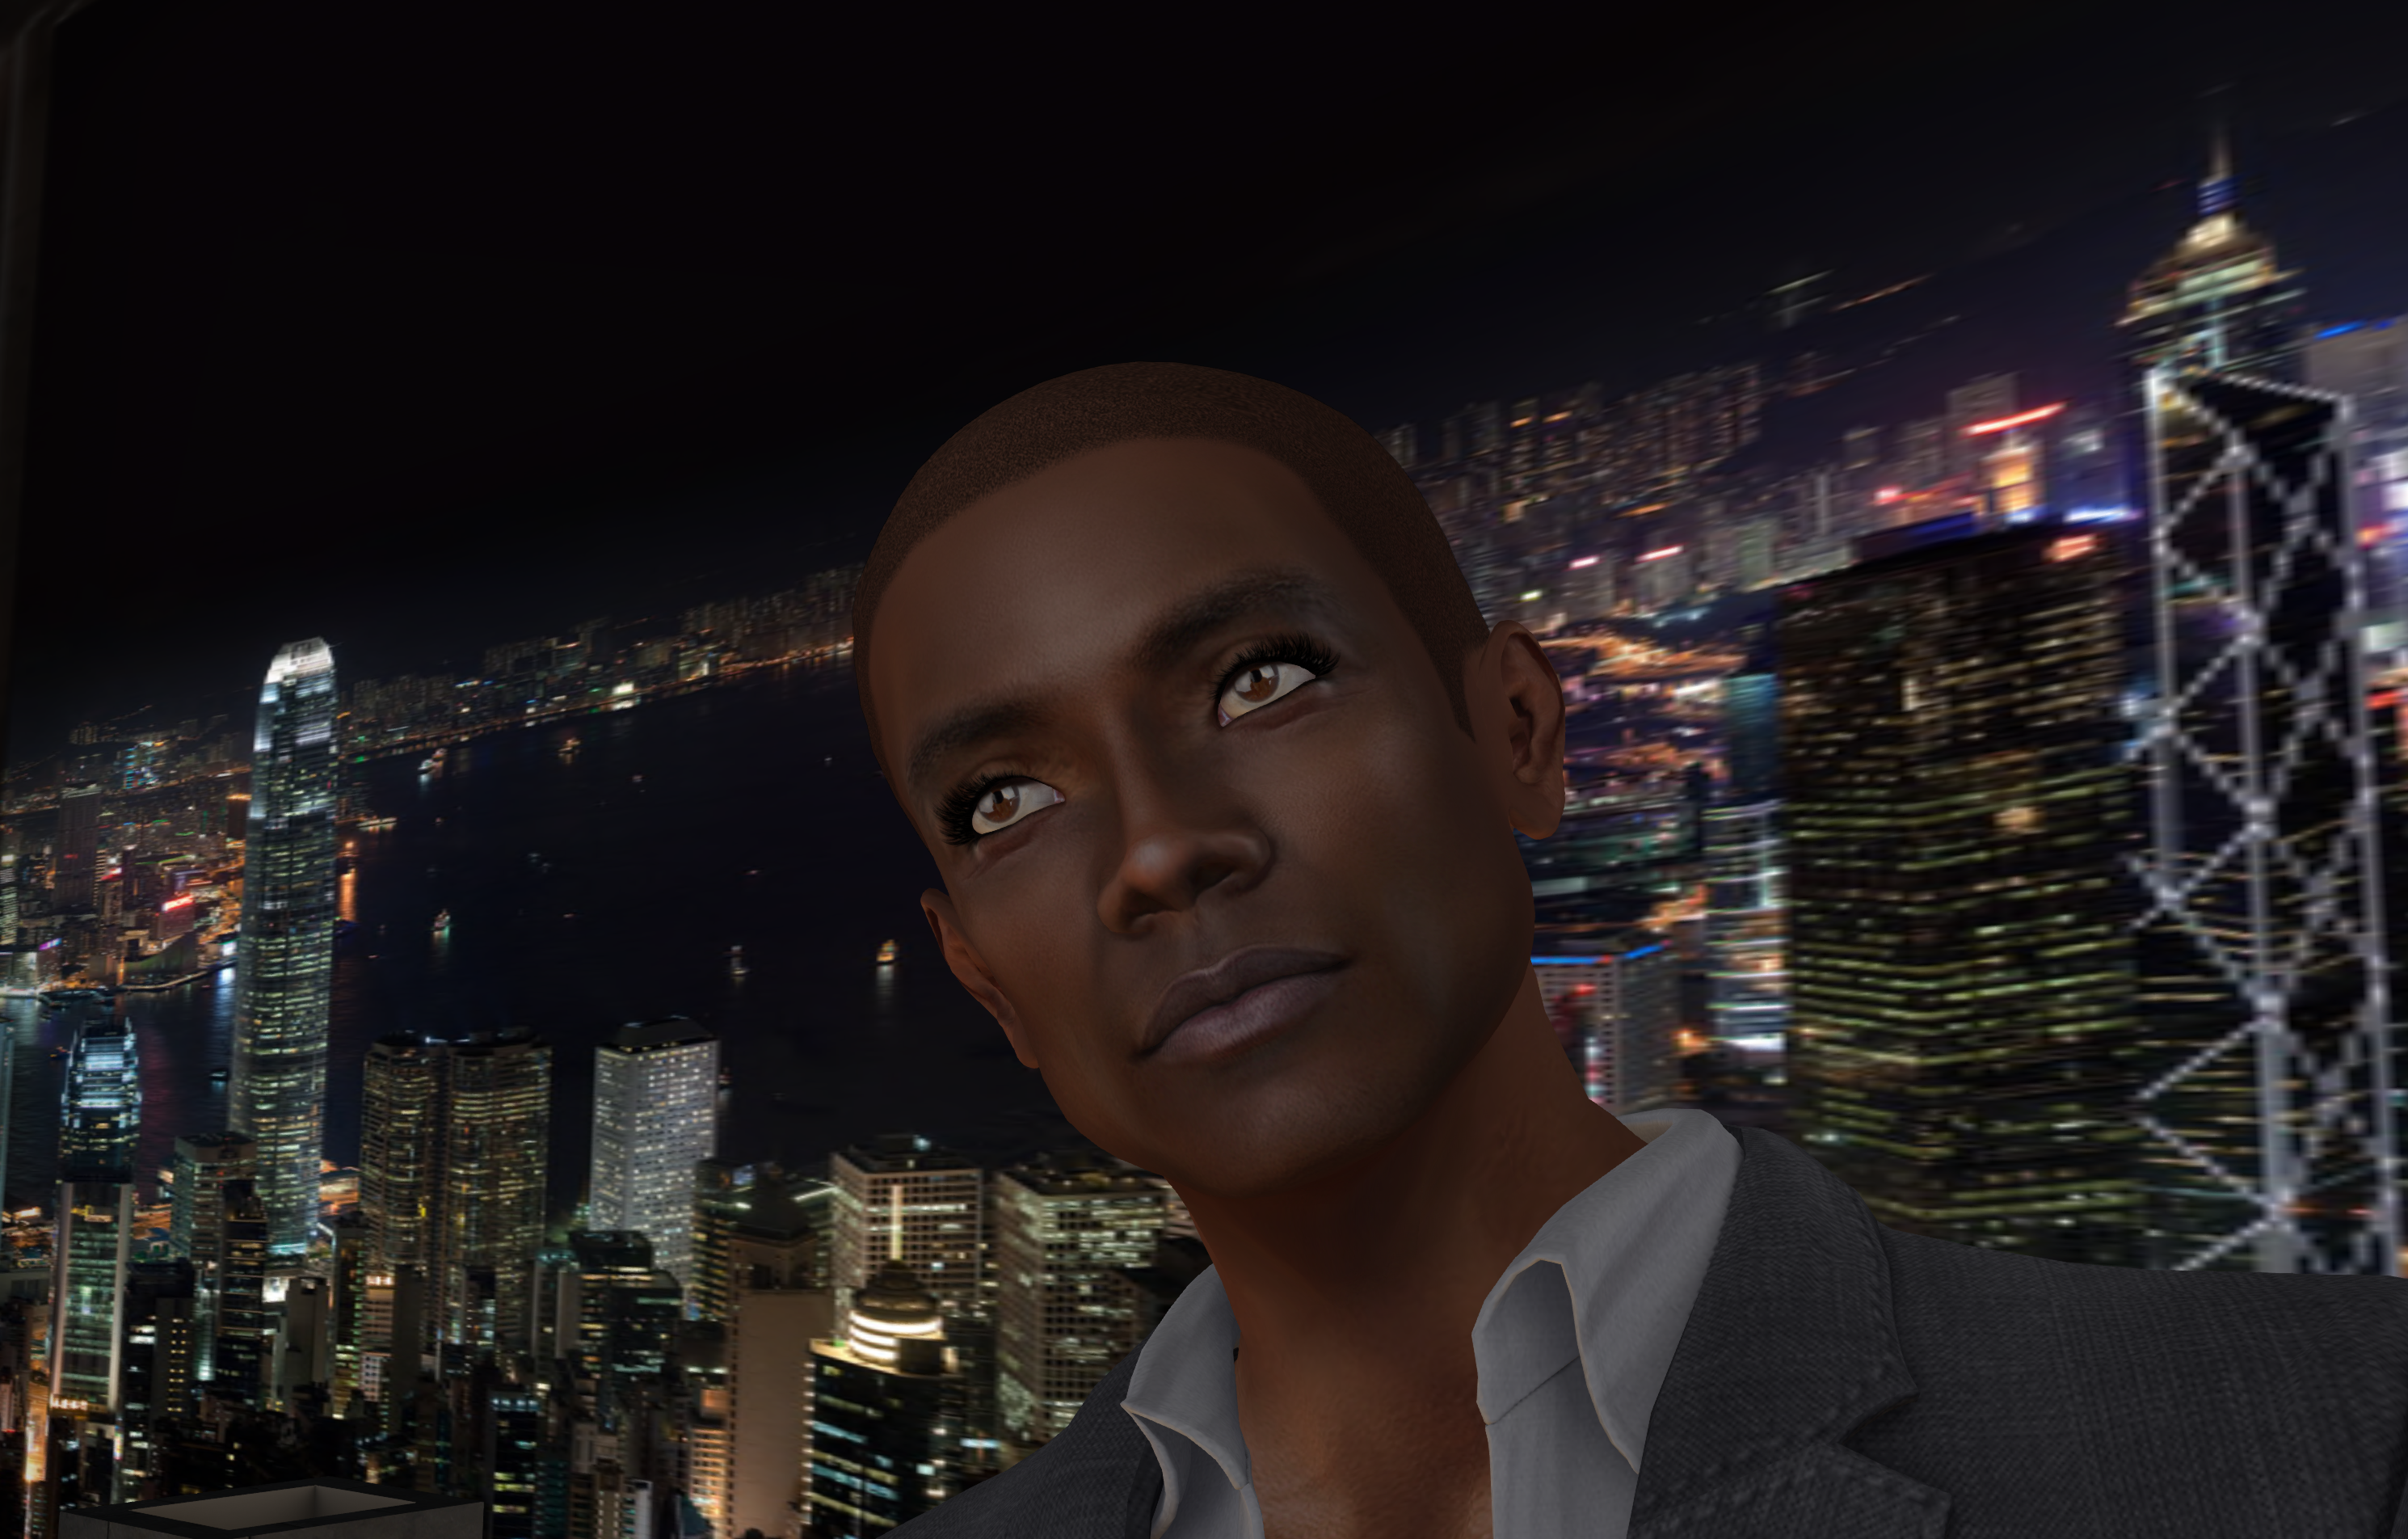
It shouldn’t be too difficult to note the lighter spots in the skin on the forehead, around the eyes, the cheek bone and jaw. They are more pronounced on the left side.
I initially tried to use the clone stamp to get rid of them. This didn’t work well in the eye brow. I tried sampling the colors outside of these areas and painting but my inexperience with Photoshop screamed loudly as I lost skin texture. I wrote to the creator hoping for a skin with no highlights but as of January 1, I’ve heard nothing back at all. My biggest concern is that even if I find an easy way to get rid of these spots, I will have to do it every single time I photograph him.
I solicited advice from a PS wizard who gave me two options to try. The first was to create a solid gray layer to burn and darken the tones while the second was to use frequency separation. This was something I had no experience at whatsoever so I was off to watch more tutorials. There are many but one of the first and best I watched was “PHP Method” of Frequency Separation in Photoshop
This worked quite well. It is still somewhat tedious – especially on the area in the eye brows but it’s doable and I’m sure it will get easier with practice. This is how the first image was created.
I then tried her other suggestion of creating a new layer of neutral gray, setting the mode to overlay and gently burning the lighter areas beneath it. This was easier but never got as good of a result on the jaw and eyebrow area. I came to the conclusion that this must have been because the highlights may have been made by adding a lighter color to the skin rather than lightening the tone. Burning made the spots darker but they never would blend in.
Should I find an easier way to do this, I’ll try to update this entry.