Tea Party

Tea Party
Tea Party

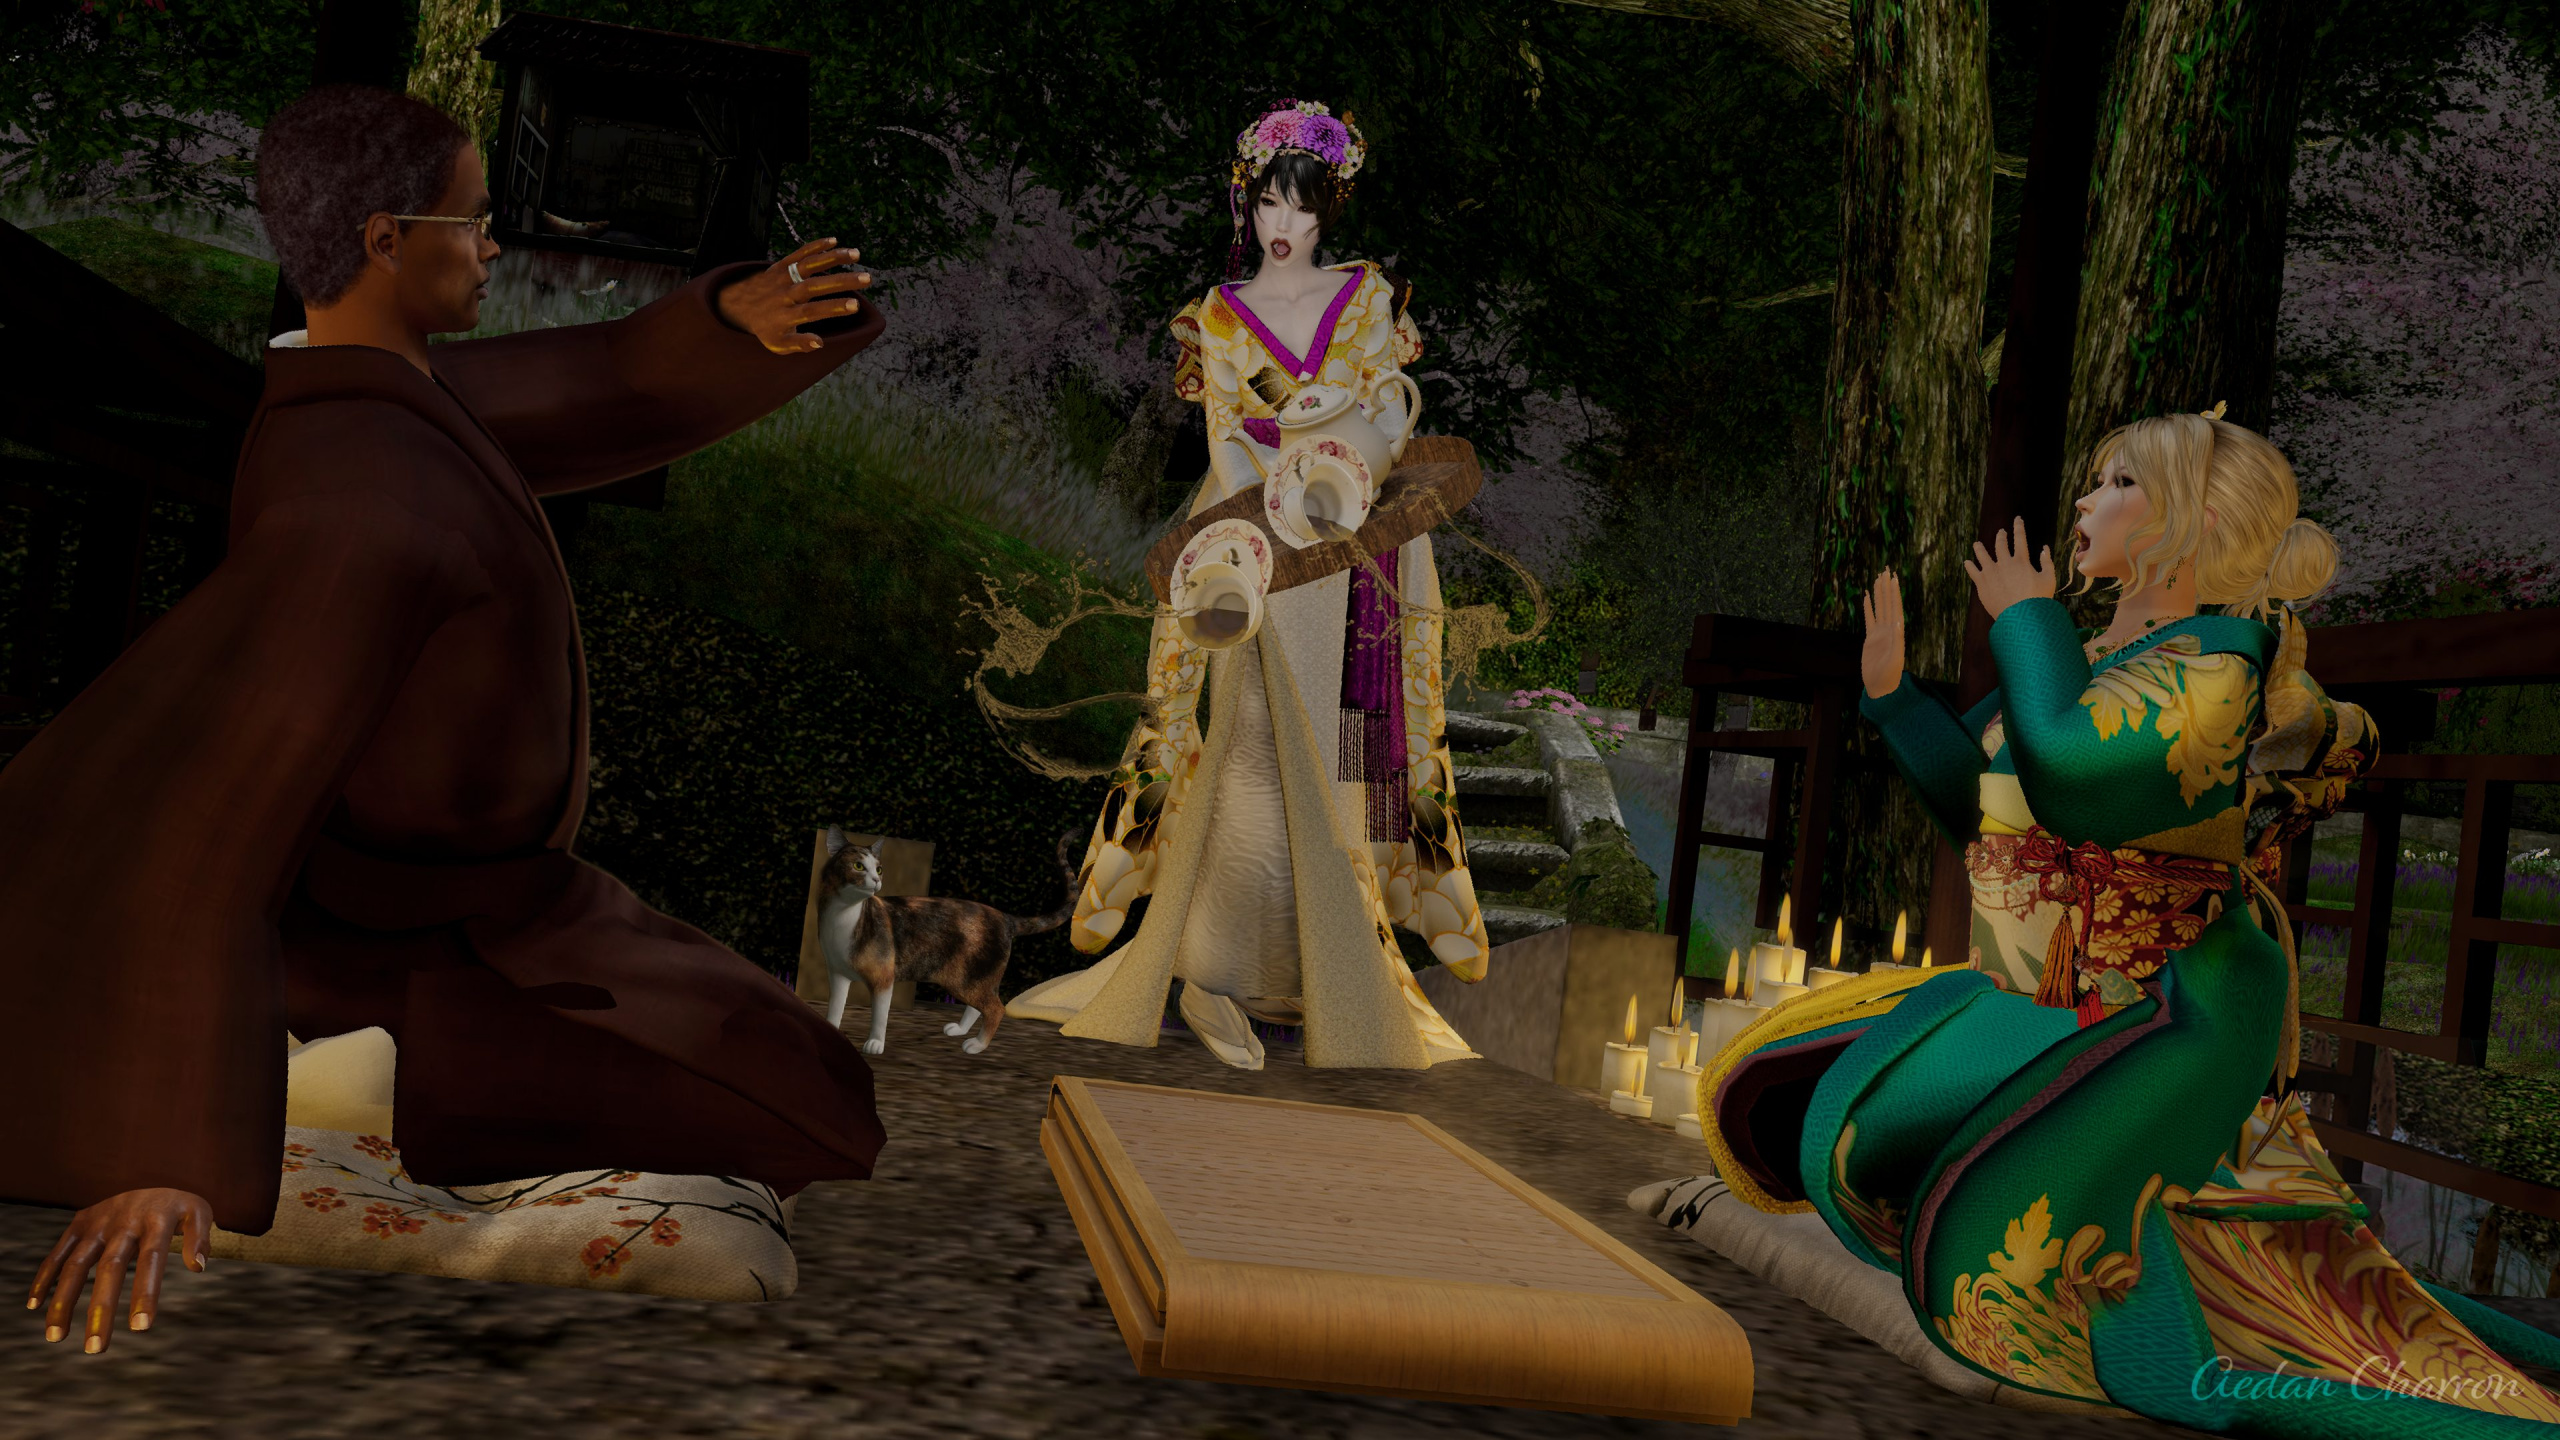
This image turned out to be a huge effort…bigger than I had imagined. To begin, I needed to find a location for the shot. We explored several places but finally settled on Dim Sum Gardens in SL. Next, Kyashi and Pattie had to find Kimon’s they were happy with. I wasn’t too concerned about Robert.  I knew he had one available though I forgot how old it was and how terribly it fit.

Then there was the search for the tea set that I could place individual items where I wanted them. To make it more difficult, I was initially turning things away because they had handles, unlock traditional cups I had seen for tea servings. After many trips and actually purchasing several sets only to find they would not fill my need, I finally bought some full perm, mesh cups and saucers. They came with textures so I new I could texture them to match the tea pot. I created the textures in photoshop and they looked perfect.

There was also the table – I wanted an empty table to set the tea serving on. Again, I wasn’t able to find what I was looking for but was able to wipe the table clean in photoshop.

I had noticed white things floating in the air but figured photoshop would take care of that. Additionally, I had a cat to add. My list was long but not overwhelming.  Similarly, while shooting, I noticed that I would have to  fix Pattie’s kimono but this was all manageable. So, I took the shot.

Original Tea party Image

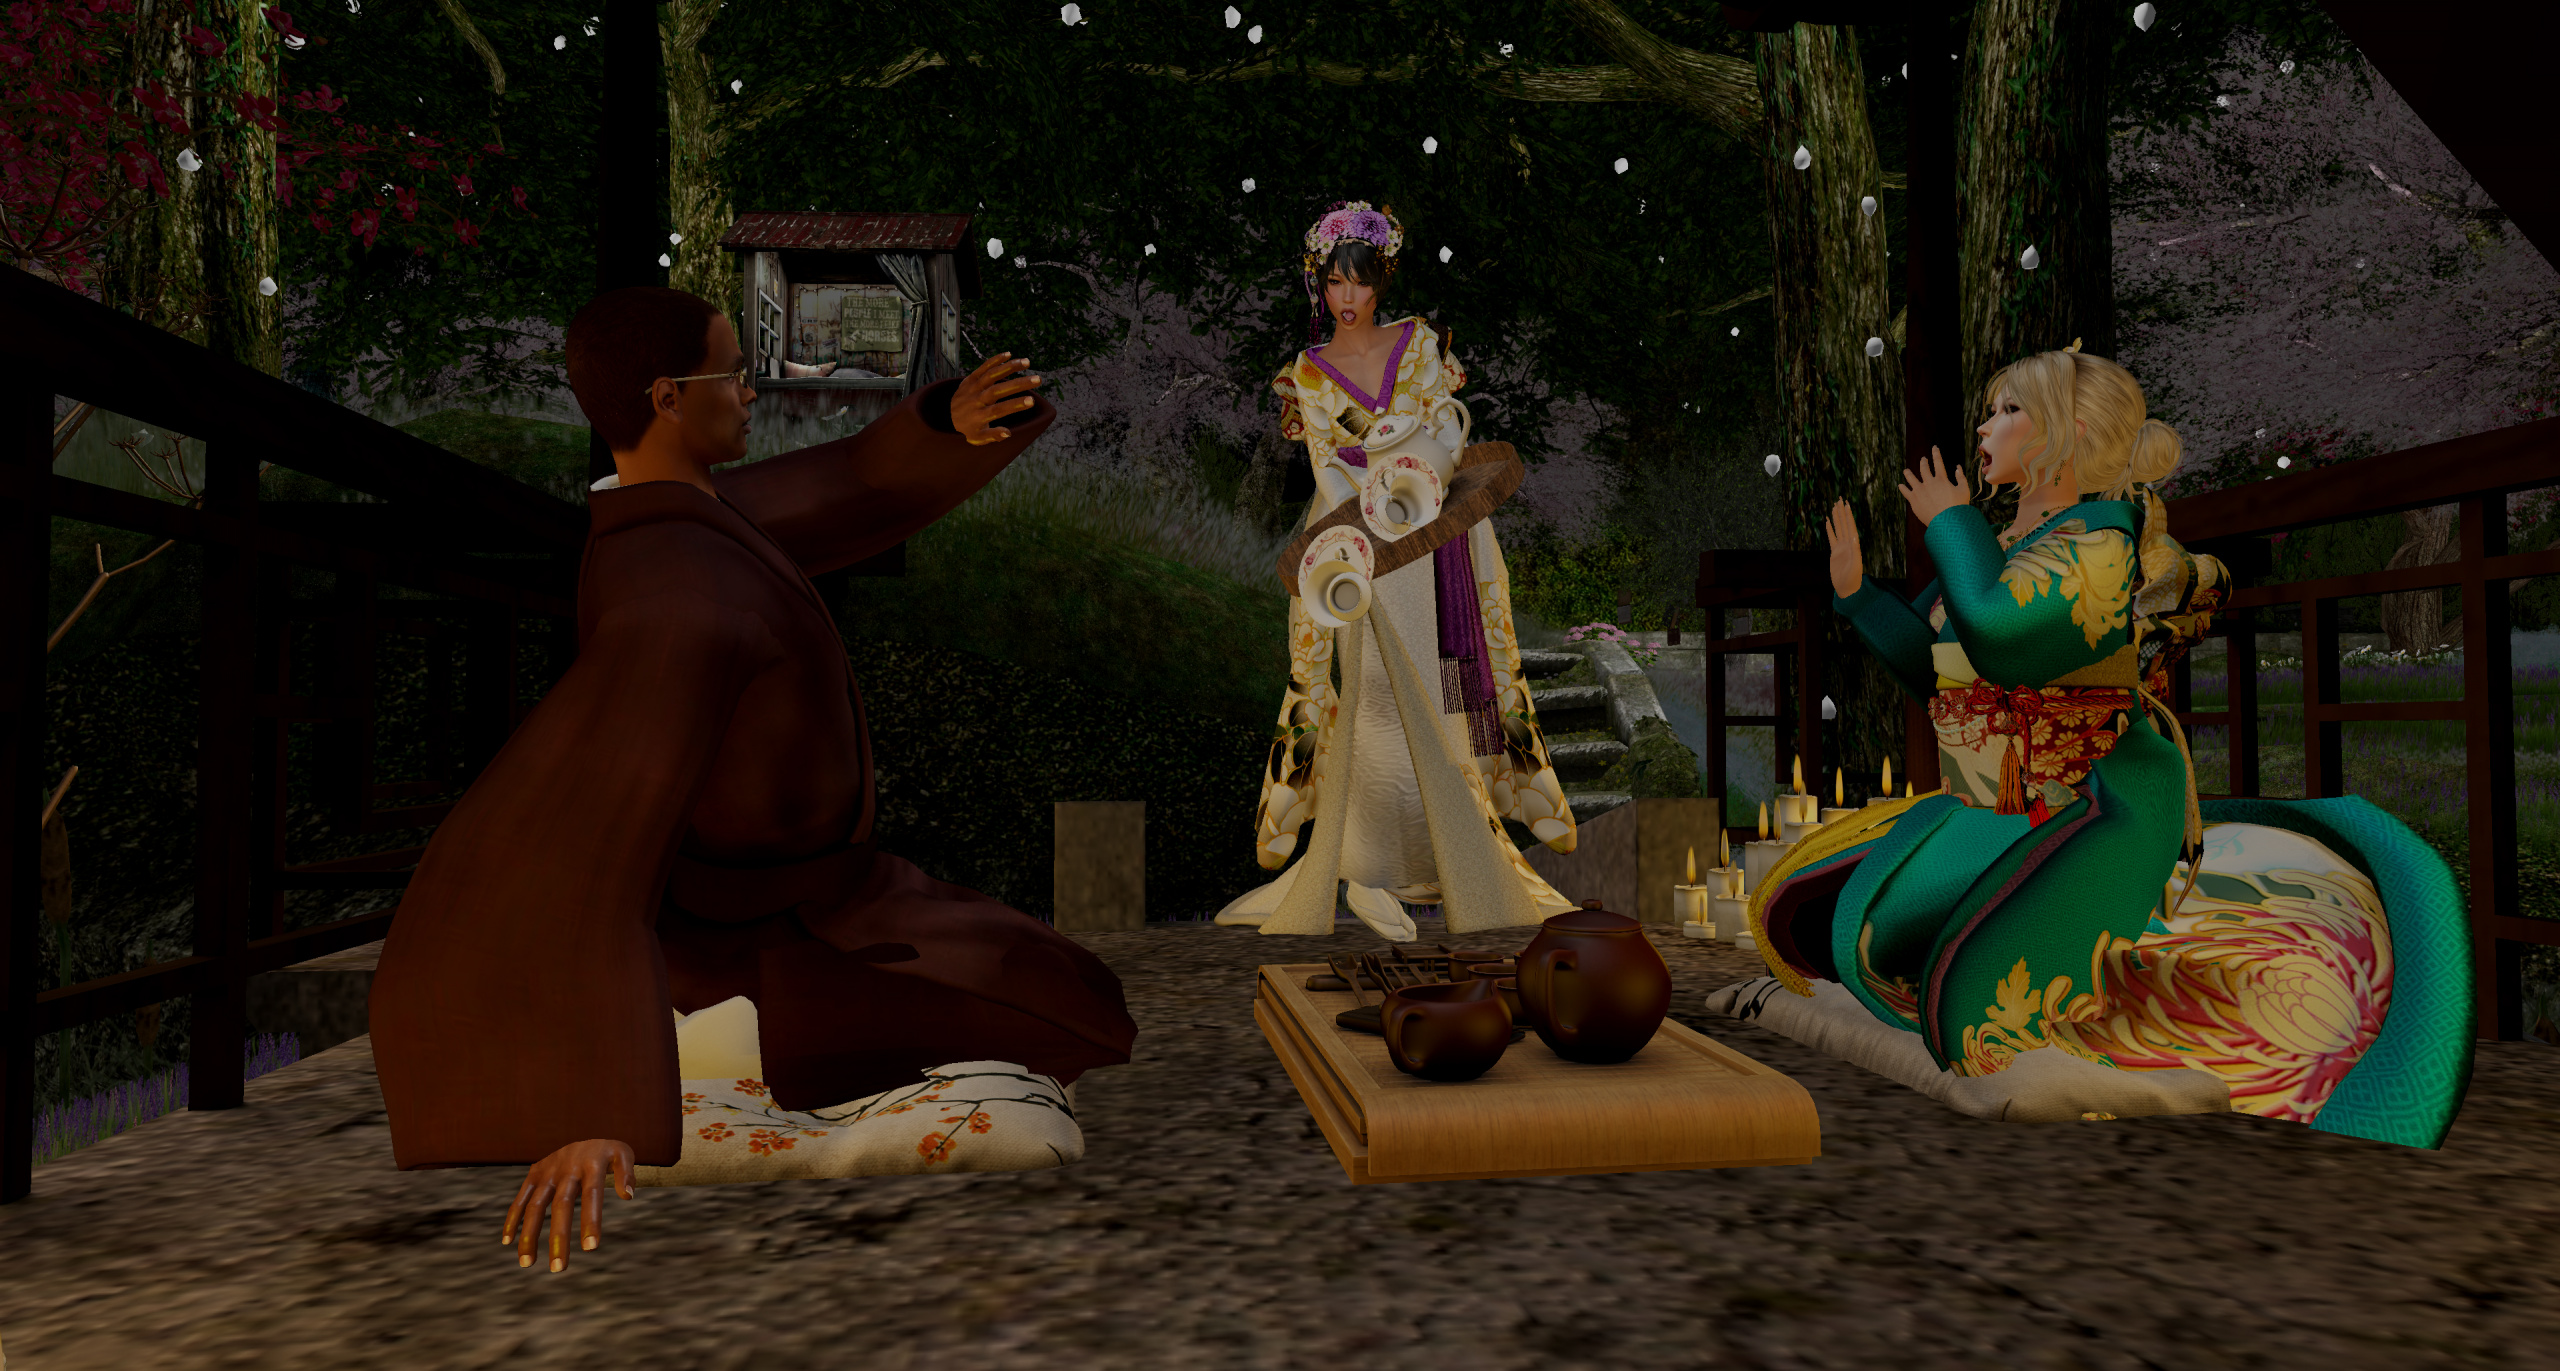
It took me a while to notice the tea cups and saucers. I recalled reading complaints about Balck Dragon and transparencies but i didn’t fully appreciate them until now. If you zoom in to the cups you’lll see my problem.  I had created the textures with a transparent layer (in .phg) for no good reason and now I had unrecognizable cups and the only option at this point was to repair them by hand while they played tricks on my eyes.

There were wardrobe issues that I had to address, the building being lit in the background.  Missing ring, fence mending, and tending to the cat to ensure he was sat the right light.  The list of repairs goes on and on.

Finally, there was added lighting and shadows and…and flying tea.

Adding splashing/spilling liquid was a new effort by me. All the videos I found made it look simple and had I not cared what it looked like, it was simple. but I did care and struggled to get the correct settings. Finally, i had to say ‘enough’.  I could have spent a lifetime on this one but I was ready to move on.

I am quite happy with the finished result though. Yet again it was a great learming experience…but hope to do some easier shots for a while.

Onc

Facebook
Twitter
Tumblr
Email

Breathe

Breathe
Breathe

Without sounding like a broken record (hopefully!), this image is yet another created as an artifact to the ‘bigger’ image that Pattie and I are collaborating on. Kyashi and Pattie spent a lot of time shopping for kimonos for the upcoming shot. There were so many to look at!  It was easy to weed out many simply because we didn’t appreciate the fit or style but in the end, there were so many left to choose from that it was difficult.

In fact, Kyashi couldn’t really decide so she bought a fatpack (which means there will be more images of her in a kimono). Then there was the hair piece and socks and shoes.  All this was going on while also searching for and in some instances, creating objects for the ‘big shot’.

Finally feeling quite happy with her choice of kimono, Kyashi couldn’t help but stop and talk to the birds at the gate of Dim Sum Gardens while on her way to take a closer look at the actual photo location.

This is one of the first images taken in the Black Dragon viewer and did require a small amount of post processing. The blurred background was done in world, but highlight was added to most everything in the foreground – flowers, dragon, birds and of course, Kyashi.

Kyashi’s pose was created using the poser in Black Dragon which I love.  There is so much flexibility that it is easy to move the wrong thing and too far. It does take some getting used to but I think it work the effort.

In the end, I was quite happy with the way this one worked out – both during the process and in the final result.

Facebook
Twitter
Tumblr
Email

Believe!

Believe Image
Believe!

I had begun to doubt the day would come when I published this image. It is very much a composite that was plagued along the way by many instances of “oh! it would have been easier if I just….”  So, when the opportunity came to create a profile image for Pattie and her new head, it was a welcome break.  Believe!

Even while working on the other image I was considering just starting over with the original photograph for this scene and then do it as I realized I could have done it much easier.  That was interrupted by my new interest in the viewer Black Dragon after learning that one can also set poses from within the viewer.  Were I to use Black Dragon, Aedan would not have to be composited into this scene…  However, Black Dragon may become a post of it’s own. In short, I’m struggling and may have to actually read the manual!

However, after over a week away from the image, when I opened it again I realized it was very close to being done…too close to start over.  At that point, it required only some shading on his palms and a level adjustment for the entire image.

Getting to that point included taking two photos – one for the primary night scene and a second daytime image to be illuminated by the three sources of light. I didn’t realize that getting such a bright moon near the horizon is not an option in SL these days so to achieve the full bright moon and it’s subsequent moonlight, I used a curves adjustment.

Aedan was shot in the studio using AnyPose and then carefully painted in behind the fire pit.  The fire was added so suddenly that the snow hadn’t even had a chance to melt from the stones or pots 😉

I hadn’t chosen a name for this image until I found a tune I wanted to associate with it.

Facebook
Twitter
Tumblr
Email

Pattie – YFMB

Pattie's Mesh Debut
Pattie's first mesh photo

Since returning to SL, Pattie has been appreciating the details that mesh introduced to SL in her absence. Not yet ready to take the plunge into a full featured and detailed mesh body or head, she did come across the “Your First Mesh Body” offering which comes at the very tempting price of ….FREE.

Of course, Free has it’s price. What you get for free is both a body and head which are not high detailed though do have all the correct parts. In addition, it comes with huds to implement transparencies in the body where practical and apply skin tones. YFMB also comes with a selection of shapes and hair. Finally, free clothes are provided so there is no need to leave the place naked in your new body.

After a bit of tweaking, I managed to create a new shape that I found pleasing and hoped she would too. No complaints.

There are two glaring issues with the head when you put it on. The first is the head to body joint. They don’t match and no amount of fiddling that I did with the neck size would make them match.  The second is that unless your cheeks are flat, they are blocky and rough.  That however, is just a challenge for me and my developing photoshop skills!


Pattie Close Up - YFMB Issues

From the original photo for this shoot, the above images shows the lack of detail in the face.  This is actually quite subdued because it was in shadow for this image. In full bright light, it is painful.

I found it necessary to use frequency separation and address both the high and low frequency layers to smooth the cheeks out. In hindsight, I could have removed a bit more of the darker color from beneath the nostril but I was being cautious about removing too much shadow while removing the blocks.

Pattie Close Up - YFMB Processed

With the high and low frequency layers available, I also took advantage of the opportunity to smooth the eye openings and clean up the lips – more short comings of this body.

As shown in the original photograph below, I’m often amazed at what I over looked – like the full bright necklace that is nearly as bright as the sunset 😀

It took me quite a while to tone that down using a mask and adjusting the exposure level then finally adding a little shadow detail.

Pattie's Mesh Debut - Original Photo

Finally, highlights and shadows were added. Because she was in full shadow, adding too much highlight was easy to do. It just didn’t look natural so in the end, I had to dial it way back to the point that it is very discernible though it is every where…face, hair, chest, arms and dress. The eyes that came with the YFMB body were very flat and lacking detail though I did add a bit of highlight to those too. Subtle is the lesson of the day.

Except for that necklace 😀 

Facebook
Twitter
Tumblr
Email

Splish Splash

Noel preparing for a bath at Kindred Spirits

The Kindred Spirits sim has so many opportunities for photographs that Noel soon found herself unable to resist the temptation to enjoy the bath she stumbled across.

OK…so she did resist. Rather than jump into the bath right there, this image is a composite of the bath, Noel (several of her with and without shoes) and the cat whom I will affectionately call Calypso after a recent cat now passed in my RL.  At some point, this cat will be updated to more closely resemble the real Calypso but that’s another story…another image.


Facebook
Twitter
Tumblr
Email

Robert

Overkill - Robert Hawkins
Robert Hawkins

The ‘official’ introduction of Robert along with a tune to fit his character….in part.

This ended up being a fun image. As mentioned in an earlier post about Robert’s skin, I had to fix the embedded highlights first. It was initially a challenge until I figured out that both layers generated using frequency separation had to be cleaned up.  It wasn’t simply a matter of fixing the color on the low freq layer but there was also texture in the high frequency layer that was affecting the visible color in it’s own way.

Additionally, I hadn’t noticed when the shot was taken that the recent SL phenomena of a very visible horizontal line crossed his face with everything below his upper lip being many shades darker.  This two demanded cleanup on both layers.

The glass was the ‘new’ lesson for this image.  I have done reflections prior to this (El Sombrero) but this time I wanted realistic rain outside. In addition to painting in rain, I duplicated the method used in the following video – including the wet glass texture.

I played with several techniques trying to get the light and shadow I wanted but finally settled on using the lighting effects filter to place a spotlight on the lamp and then adjust the spotlight size, shape and color along tweaking the ambient light a bit. In the end it is very close to what I had done with duplicating and multiplying the final layer and then shaping the light with a mask. The spotlight looked much more natural to me so why reinvent light?

Finally, to summarize the feeling that the act of creating Robert’s character for the story I’m writing and what I saw in the final image, I listened to many pieces trying to find one that suited.  I settled on Overkill by Colin Hay (Men at Work)

I can’t get to sleep
I think about the implications
Of diving in too deep
And possibly the complications

Especially at night
I worry over situations
I know we’ll be alright
Perhaps it’s just imagination

Day after day it reappears
Night after night my heartbeat shows the fear
Ghosts appear and fade away

Alone between the sheets
Only brings exasperation
It’s time to walk the streets
Smell the desperation

At least there’s pretty lights
And though there’s little variation
It nullifies the night from overkill

Day after day it reappears
Night after night my heartbeat shows the fear
Ghosts appear and fade away
Come back another day

I can’t get to sleep
I think about the implications
Of diving in too deep
And possibly the complications

I worry over situations that
I know will be alright
It’s just overkill
Day after day it reappears
Night after night my heartbeat shows the fear
Ghosts appear and fade away

Facebook
Twitter
Tumblr
Email

We are using cookies on our website

Cookies are used to help improve the usefulness and attraction of this site. Please confirm, if you accept our tracking cookies. You can also decline the tracking, so you can continue to visit our website without any data sent to third party services. Thank you.