Still Here!

Cracked Display

In first world terms, life has been a bit hectic lately and kept me from updating my ongoing story for several weeks….but I am still here

Changes at work mean I am now working from home full time – except when I need to travel to go onsite to address issues that can’t be handled remotely.  That meant a redo of my office which mandated removal of everything in there. I’m happy to say it looks so much better and that makes me happy since I’ll now spend an additional 8+ hours a day in this room.

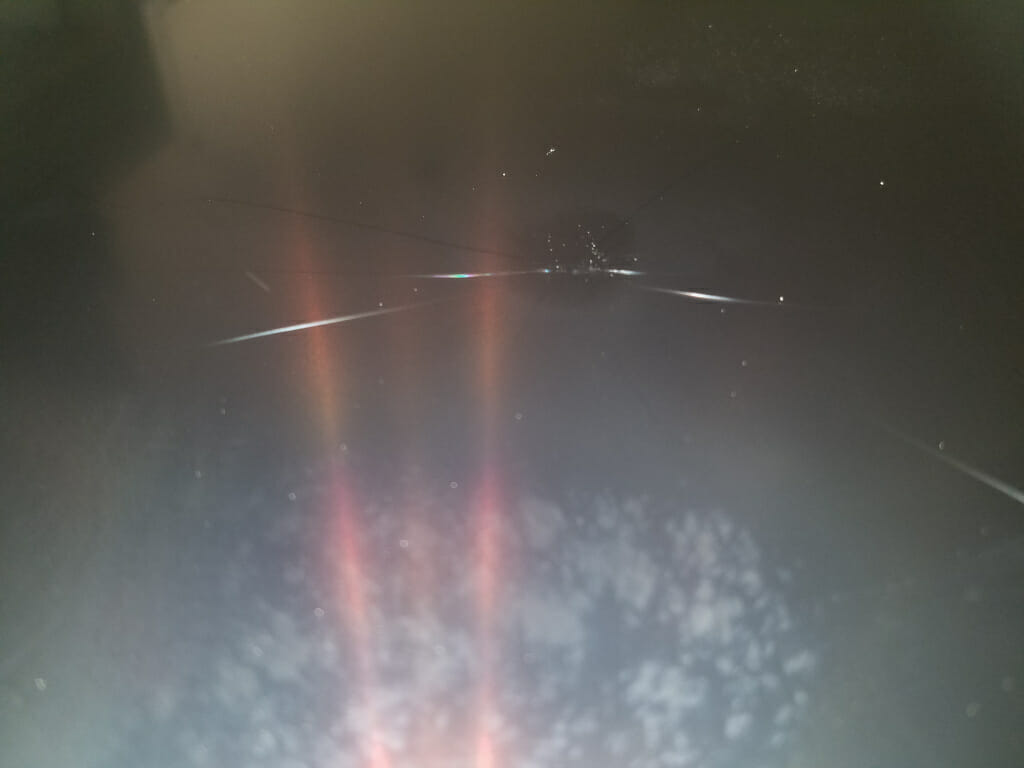
Unfortunately, during the process of moving out and back in, I damaged my 3 month old 4K monitor.  When I picked it up I noticed a smudge on the screen and when I tried to wipe it off, I realized there was a ‘bump’ sticking out.  I didn’t actually know it was cracked until I powered it up. Broke and Dell doesn’t offer to repair cracked screens though they were happy to sell me a new one for $130.00 more than what I paid for this one from Amazon.  It is physical damage not covered by the warranty.

Initially I couldn’t even think of how I might have damaged it. The bump pressing out suggested  that something inside went wrong and had a mini-explosion.  The Dell rep pretended to not even hear my suggestion.  After accepting that they weren’t going to fix it, I later recalled that with everything sitting on a rug on the floor, I moved he rug once and the monitor – which was sitting on it’s stand on the rug, fell forward and landed on the PC case.  At most, the spot on the screen where the crack is located – which is in the lower half – must have moved 6 inches.  Mind you this was not a drop but merely tipping over on it’s stand. If this display is THAT fragile I really had to think about whether I wanted to throw any more money at it.

With that thought in mind, I hauled it to the street for pickup and reconfigured my workspace to use my trusty Viewsonic monitors. A little bit of testing and I’m not sure why I bought the 4K monitor. I marked this off as the universe encouraging me to take one more step at simplifying.    Then I mentioned my problems to a co-worker who suggested I could purchase the screen and replace it myself.  Of Course!

I located a replacement screen. $140 + $96 shipping is still less than half of what Dell wanted for a new one.  Since realizing I didn’t need that screen and appreciating the extra space on the desk, I have held off from ordering the part yet but am sure I will at some point.

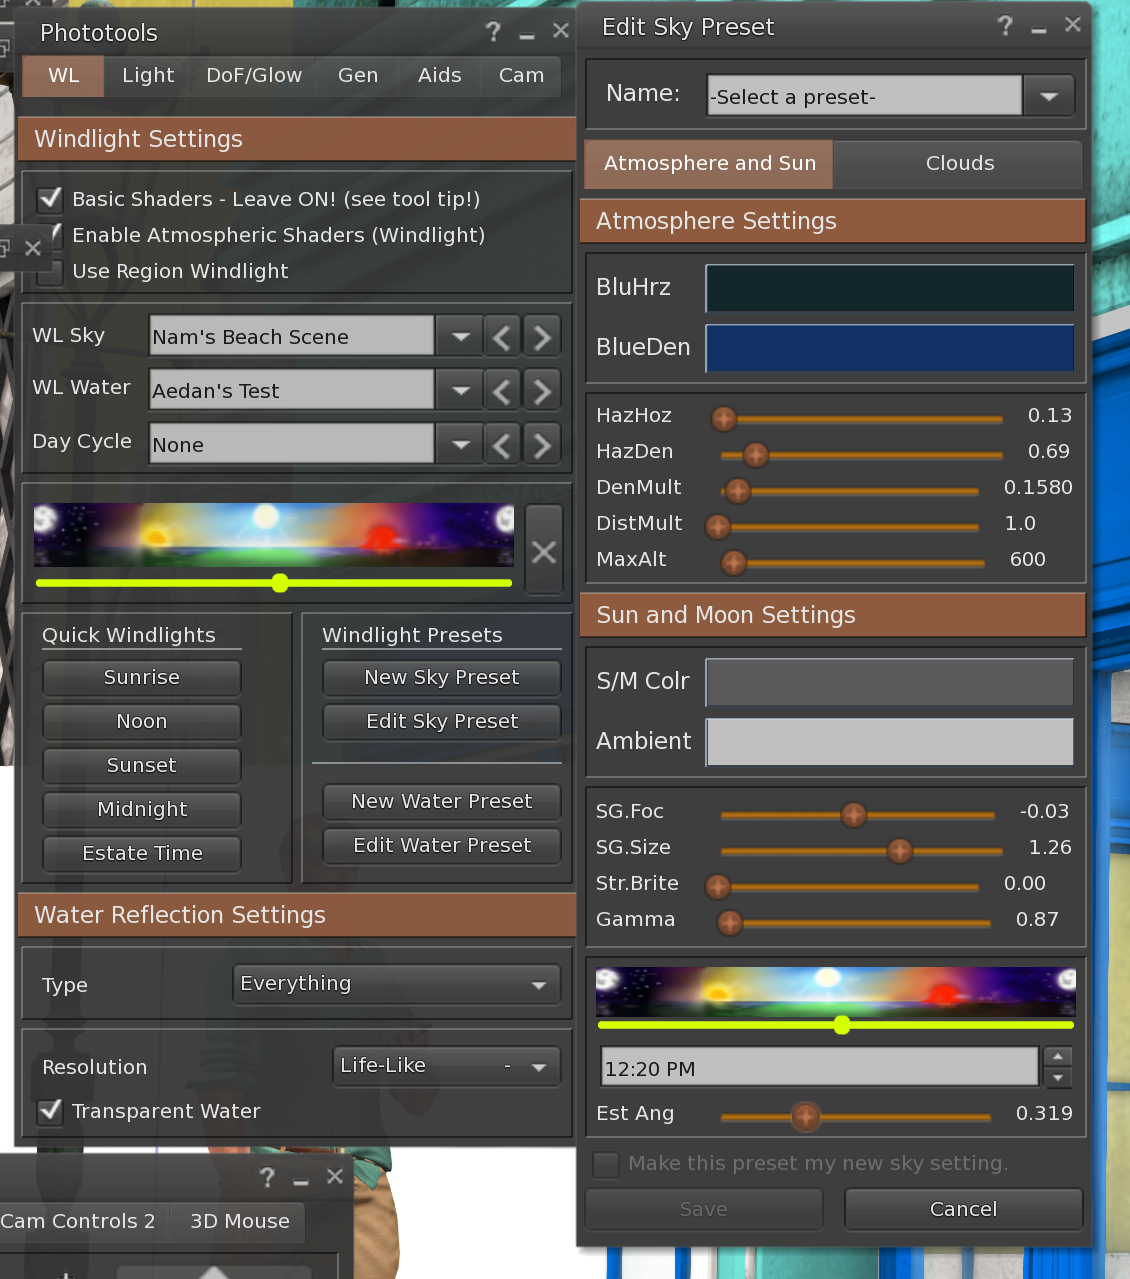
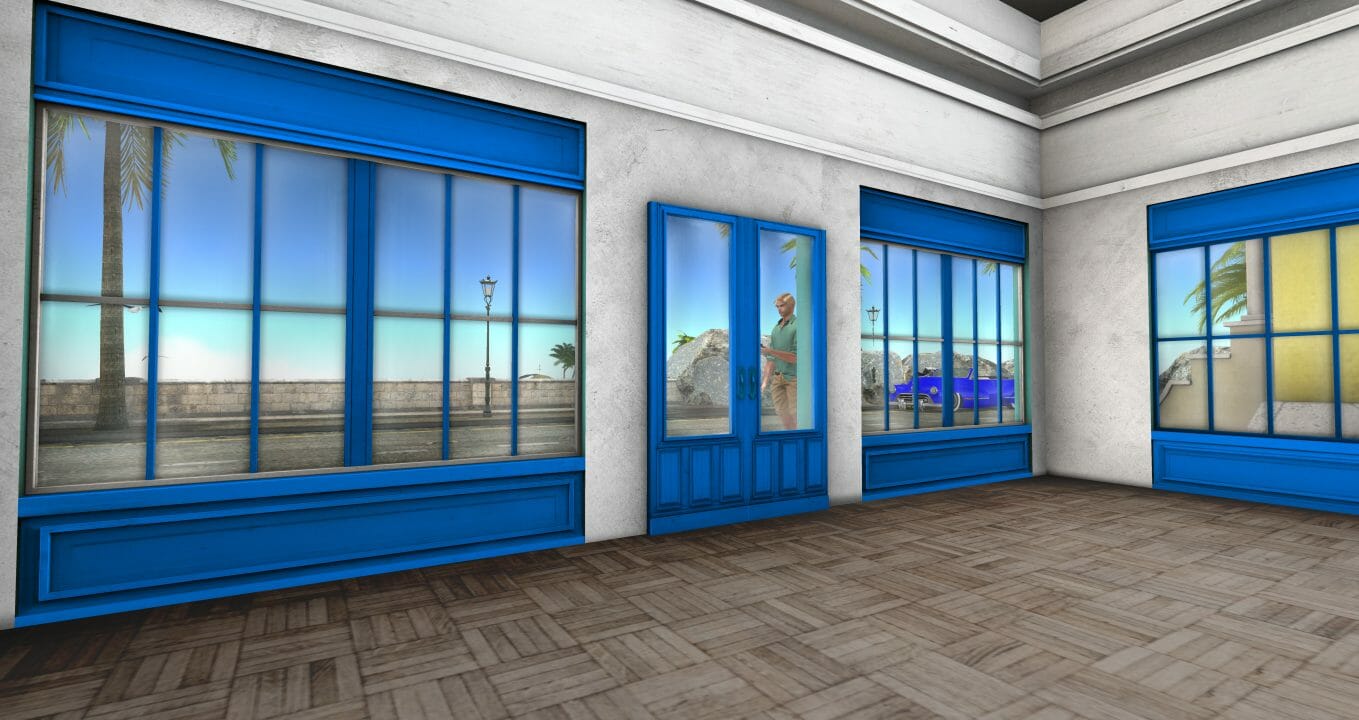
In the interim,  I’ll get back to my work…or play.   The next image is ready to share and the story that goes with it is 98% complete.  I have yet to settle on the music to go with it so that may be the most difficult part…but I will manage 🙂

The Process

Call me a late bloomer but the idea of focusing on and enjoying the process, or the journey rather than the goal is somewhat of a new idea for me. Though I’m sure somebody muttered words to that effect many times in my 59 years it was a bit less than two years ago when I stumbled across a book in a quaint bookstore in Boulder, Colorado.  The book is titled “The Path Is The Goal” by Chögyam Trungpa.

When I began this project and built this site it was to be specifically about my new found interest in creating digital images that were given birth in secondlife.com.  Yes, I considered that I might find other worlds to also create images. The virtual worlds being created are truly amazing and beautiful – all that one can imagine.

While looking for inspiration from others in the secondlife community in flickr, the idea of writing a story and creating images to illustrate it burst from some hidden corner full of wants.  From my earliest days in secondlife I imagined that it would be a great place to tell a story. This is certainly a part of why I came to enjoy role play so much. 

The possibility seemed magical when I thought of it this time. Not only could I travel all over secondlife (from here after, known as SL) to get beautiful images but I could build sets when I couldn’t find the right spot.  Soon, I came to see that I needed specific poses – there’s an app for that – called anypose.

Next came the curiosity of how some were creating specific lighting in their scenes and when I learned of LumiPro – I had to have it.  Mind you both of these have features that take a little study and effort to really use them effectively.

I was ‘ok’ with gimp as an image processor but a little envious of what I saw being done with photoshop.  I actually made the photoshop jump once before but after reading rumblings about Adobe’s marketing techniques I jumped back to GIMP and I think, have become fairly comfortable with doing things that I struggled to grasp 6 months ago.

Recently, I’ve struggled with Gimp for several reasons. I have to vastly different monitors. The newest and favorite is 4K and call it age or whatever but the largest font of the UI for Gimp is still too small for my eyes. However, when I drag stuff to the older, HD monitor, Gimp fails to compensate correctly and suddenly the letters are inches tall and the window edges are somewhere off in space.  It’s not conducive to work flow at all.

There have been several other minor issues including most recently  artifacts that began appearing just as I was about to finish the Havana Sunset image. I struggled to find and get rid of them but in the end converting the image back from 32 bit to 8 bit did it.

In summary, while watching Natsumi Xenga doing her magic in Photoshop; seeing how smoothly she works and how she massaged things in ways that I don’t even think Gimp is capable of yet, I gave in again.

This “Spring Break 2019” series was intended as a learning process for me and it truly has been that.  Not only have I learned much graphically (and will now be stepping back just a bit to relearn in photoshop what I had mastered in gimp) but I’m also learning that writing a story is much, much more than spewing a few words out that link together nicely. 

Ok!  I wasn’t that naive but only by doing does one fully appreciate what it takes. Character development, story line and all the twists and turns of writing have now planted a seed of interest for me too.

I will soon finish this Spring Break series and put it to bed. It has given me much fodder and yes, the characters created there will carry forward into the larger project but that will be handled differently than this ‘Spring’ series.

I hope you will enjoy that but in the interim I hope we will enjoy taking this path together. In any event, I am enjoying the process and the learning along the way.


—Aedn

Time Off

Almost happy

When I scheduled some time off around my birthday it wasn’t because I had anywhere to go specifically but with work looking so busy through the rest of the year I wanted to use some days of my choosing rather than try to squeeze them in at everybody else’s convenience or lose them.

I figured I would get some things done around the house and perhaps get a couple images created in the two weekends that surrounded my week off.  Unfortunately, my 30 day old Veikk Pen Tablet which I have been very happy with up to this point decided that it too was going to take some time off.  The image I was in just beginning when this happened was going to require an abundance of hand edits that really required the tablet.  Sure, given enough time I might get them done with a mouse but I don’t think I could get the same amount of detail with the mouse.

Amazon, where the tablet was purchased has a 30 day return policy for this device. I purchased it on July 2nd and on August 2nd I found that it began editing when the pen was still nearly an inch above the tablet.  Sure, I should have called Amazon right then but not realizing I was right at the 30 days I spent a few hours removing and reinstalling drivers, doing windows updates and installing drivers again.  When this failed I installed it on another machine but got the same results.

Amazon did line me up with the seller of this device to request a warranty replacement (warranty is for one year) and the seller responded later that same day with apologies and the intent to send a replacement pen. Hopefully it is the pen and not the tablet itself since all of this waiting time right when I had hoped to used it the most is quite inconvenient. 

Standby for an update.


BTS – On The Beach

First, I will say that this image has  revealed a few issues and created a few frustrations. I will list them right off the top to get them over with.

  1. I am not happy with the pose I created. I created the pose with a specific image in mind but when trying to put that image together, I changed my mind but kept the pose. It wasn’t until late in the process when I really decided I didn’t like the pose but by then it was too late to go back.
  2. The current version of GIMP which I am using (2.10.10) has a ‘new’ option to enable using 32bit floating point precision when editing images. The default is 8 bit and I wouldn’t have considered changing it until watching a video pointing out that it was available and I should be using it….so I did.  When I thought I was all done and went to use Irfanview to resize my image for uploading, the image was much darker than I had created. When I resized using GIMP, they looked fine but upon uploading to this site, the uploaded image was also several shades darker. An hour after back tracking and undoing I finally determined that setting GIMP back to 8 bit before exporting the image resulted in the expected uploads.
  3. Finally (so far!) After sorting the above out, when I uploaded the images for this post I noticed that all of the files I have uploaded since installing the EWWW image optimizer have been converted from the original .png to .jpg format even though I specifically disabled that function. A google search took me to EWWW’s site where 9 months ago, a user complained about this very thing. The response was (paraphrased) “You obviously don’t know what you’re doing so we took care of it for you. If you REALLY  wanted to keep your .png images, justify it to us and we’ll think about it.”  Yeah, I’m looking for a new image optimizer or at the very least, a way to leave the original uploaded files untouched. This server is a backup repository for my original images.  Don’t touch!
  4. Finalcut!  Way back I was given a copy of Finalcut Pro…a $399 value. I decided to use it when creating the videos for this effort. What I am doing is super simple yet nearly every video has been a pain because Finalcut Pro is not intuitive and even when  you think you finally figured out how to do something simple…sometimes it just doesn’t work. It’s not just me. I’ve watched several videos of extremely frustrated users and learned from a coworker that uses it professionally that this is normal.The video created for this one was another frustration. I’m not trying to do anything fancy so rather than continue frustrating myself, I’ll most likely not use Finalcut in the future.  My 29.95 Movie Maker 6 will do the same thing much, much easier..

There!  I feel better now!

Now, onto the process.

This effort began with two pictures only because of the conflict with Aedan’s hat and hair.  I could have just drawn the hair in I suppose (and did later) but to start I wanted a ‘clean’ image with his hair in place and not pouring through the hat. So, after lots of tweaking to get the sun as I thought I wanted it and moving around to get a decent composition, I took the first image.

Hair was removed and the second image was grabbed. Close inspection will reveal that the bird and trees have moved between images so though they are otherwise identical, a choice had to be made about which to use.

Two layer maps were used in GIMP to introduce the gausian blur to items above the wall and gradually, behind the grass at the edge of the sand.

First shot for "On The Beach"

There were many hand-made edits to achieve the final image. The palm tree behind Aedan isn’t blurred as much as the other things that are further away so where they met had to be smoothed over.  Foot prints were needed in the sand so that he didn’t appear to have just dropped in from the sky…and sand added around his left foot that is bearing weight.

Shadows were added where I felt windlight had failed….under the brim of the hat, on his cheeks behind the glasses, along the left side of his torso behind the shirt and on his legs below the shorts (which in hindsight may have been a bit much but I was eager to add shadows 😀 )


Finally, concerning Aedan, I manually added hair to his beard and head since I’ve not been able to find what I’m looking for in SL. At this distance it’s unnoticeable unless you’re looking specifically for it. Future images will be closer so hopefully I will have perfected the technique by then!

The final touch was to add a flare and some dirt on the lens but the photographer took the shot with the sun in the wrong place so….he moved until there was solar reflection in the top floor window of the building across the street 😉

Aedan walking the beaches of Havana
Final Image

BTS – The Diner

I will probably say this again and again but I am feeling more comfortable with Gimp with each of these ‘exercises’ that I do. Using layer masks was initially somewhat daunting but now that is becoming second nature and greatly simplifying the task at hand by minimizing the ‘glow’ that I was struggling with image. That ‘glow’ was a side effect of using a mask to cut out pieces and replacing them with bits that were cut from another image. That was not the case this time.

The first photo is the base that everything else was added to. Christi plays both the customer and the waitress but there is only one of her…


Part 1
Part 1
Part 2
Part 2

The second image is identical to the first except Christi is now playing the customer.

While examining photo 2 to determine where the customer would be snatched and added to the first photo I noticed that her long mesh skirt didn’t behave so nicely when she was sitting. I considered how to best address then and settled on taking another photo that was identical except she is wearing the short version of the skirt to which I copied bits from the previous photo and applied them where they should have actually been then manually touched up some areas to make it all fit.

Part 3
Part 3
Part 4
Part 4

To create a more realistic scene outside the diner where the light would be much brighter, everything inside the diner was de-rendered and windlight was tweaked to brighten it up.

After applying a gausing blur to the previous image, a layer mask was used to replace the areas that were being viewed through the windows. Another layer mask was used to create shadows were they were missing.  It is when I went to fix the shadows under the table that I realized the windlight settings I used washed out the marble texture in the floor so it took a bit of work to repair that.

Final Image

BTS – El Sombrero

As simple as the story line around this photo was, creating the image was no small deal for me.  I would guess that I easily spent 12 hours preparing for and creating this image. While processing I completely started over once, corrected an issue I saw as much as possible and repeated the steps I knew well by then.

Anypose and Lumipro were both used though in the end, the only thing Lumipro was used for was to animate both avatars through the Lumipro sitball. Anypose is proving to be a godsend because in most cases I would never find an pre-made pose that would fill my need and I would have come to this conclusion after many hours of shopping.  Additionally, I have the option of adding any that might have a wider appeal to my marketplace.  (which I do anticipate doing)

In the beginning.  For “El Sombrero” I required a store to sell the subject hat. I could find nothing suitable in Havana and even traveled to several similarly themed sims but found nothing.  So, I started building a store. It didn’t take long to figure out that I don’t have the building skills to build anything  as realistic as I am demanding. I do now have some not-bad Havana style prim columns…that will probably never be used 😀

With that settled, I returned to Havana and found this building that I felt I could make in to my store if I could rez. Joining the Havana group in world for L250 gave me rez rights. With so many ideas for pics on this vacation, I could have made the previous images easier had I joined the group earlier.

The initial image was photographed with my video settings set to Ultra and the windlight setting as indicated – Nam’s Beach Scene is the initial preset. The only adjustments made was in the time of day and angle.  I was looking for something shortly after noon so the sun is nearly straight overhead.

Original Capture - El Sombrero
Windlight settings - El Sombrero

Havana is a very colorful build.  In most of my pics so far, I’ve felt it necessary to tone down the colors. This would be no different.  Additionally, to make the image more realistic, I needed different lights inside and something to fill the bare walls.  It because quickly obvious that I would need four layers to work with

  1. Aedan
  2. Store Front
  3. Display (w/Christi)
  4. Inside Walls
Attempt to create a mask in world

Using the trick I learned from Natsumi, I rezzed a prim inside the building, pulled it up close to the windows to block out Christi and the display that was already in place. I realized at the time that by pulling it so close to the wall, I lost the windows in the doors.

This wasn’t the only thing wrong with this mask – I failed to notice that the prim wasn’t tall enough to reach to the top of the windows. Though I went back in world for a second chance I wasn’t able to get the camera, viewing angle and Aedan all positioned in the exact same spots again. In the end, I had to piece together several pieces to create a functional mask.

Display Mask - El Sombrero
Aedan's Mask - El Sombrero

And so the journey continued…level adjustments, saturation tweaking, fixing missing shadows and wardrobe issues.  When the inside walls were darkened several issues came to light around the masking. Basically, I had to start over and redo some things to get back to the same point.

When I ‘thought’ I was finally done, it became apparent that all of the masking made the glass in the windows hardly visible….and on such a bright day, wouldn’t there be reflections?  I had an idea in my mind about what would be in the reflections but once I got back in world and moved inside the building, it became obvious that Aedan’s reflection would not be in the window beside him.  In hind sight, it probably wouldn’t be where it ended up at either because the column between him and the door would keep that from happening.


View from the pugh - El Sombrero
Reflections - El Sombrero

In the end…I’m basically happy with this image. The windows are too clean – that is bugging me a bit but not enough to change the image since it has been posted to flickr.

Like everyone of these, I feel I’ve learned a lot that will make future edits move more smoothly.  Above all else though, this was fun.  Can’t ask for much more than that.  Now, on with the next adventure!

We are using cookies on our website

Cookies are used to help improve the usefulness and attraction of this site. Please confirm, if you accept our tracking cookies. You can also decline the tracking, so you can continue to visit our website without any data sent to third party services. Thank you.